Sunday, January 23, 2011

Honey.Lavender.Vanilla.Bean.Ice.Cream.

Posted by LeighAnne at 7:43 PM 0 comments

Yes, yes, that’s what I said. Honey Lavender Vanilla Bean Ice Cream. We first tried it at our favorite restaurant, Hibiscus, but I was always intimidated to use lavender to cook with. Well, this Christmas, I made lavender sachets and lavender bath scrubs for my mom and Lane’s mom and had some of the lovely flower left over. I had no excuse to not try the ice cream!  It was made easy by my mom’s ice cream maker.

I will definitely have one of these babies on my wish list as summer rolls around. Speaking of summer….Can it come soon, please?

Anyway, I’ve only made one ice cream before and it was really easy. This one seemed a little bit more laborious, but still relatively easy.

As far as taste goes, it was definitely lavender-y. I think next time, I would use less lavender and more honey. It was a little bitter because of the lavender. Maybe I let it steep for too long. Not sure. We served it, however, with the Sour Cream Apple Pie which is plenty sweet and it worked really well with that. It’s not an ice cream that you would sit in front of the TV and have a bowl of, but served with the right thing, it works well.

The mixture in the saucepan ready to steep.

2011 031

Honey Lavender Vanilla Bean Ice Cream adapted from Martha Stewart

  • 2 cups whole milk
  • 1/4 cup dried lavender (I purchased in the Bulk section of my Central Market)
  • 1 whole vanilla bean, split and scraped
  • 1/3 cup honey
  • 5 large egg yolks
  • 1/4 cup sugar
  • 1 cup heavy cream
    1. In a medium saucepan, combine milk, lavender, vanilla bean and honey. Bring to a gentle boil, cover, and remove from heat. Let steep for 5 minutes. Strain mixture, reserving milk and discarding lavender.
    2. Combine egg yolks and sugar in the bowl of an electric mixer. Beat on medium-high speed until very thick and pale yellow, 3 to 5 minutes. Meanwhile, return milk to a medium saucepan, and bring to a simmer over medium-low heat.
    3. Add half the milk to egg-yolk mixture, and whisk until blended. Stir mixture into remaining milk, and cook over low heat, stirring constantly, until mixture is thick enough to coat the back of a wooden spoon.
    4. Remove from heat, and immediately stir in cream. Strain mixture into a medium mixing bowl set in an ice-water bath, and let stand until chilled, stirring from time to time. Freeze in an ice-cream maker according to manufacturer's instructions. Store in an airtight plastic container up to 2 weeks.

  • Wednesday, January 19, 2011

    Christmas Dinner with Sheriff John, the Mrs. and, of course, Jax

    Posted by LeighAnne at 11:40 AM 0 comments
    This Christmas I was able to spend 10 days with my parents. Most people might grumble about that, but I absolutely loved it! I have amazing parents who are fun and thoughtful and loving and oh so very generous. Lane joined us for 5 of the 10 days, and we had a wonderful time filled with lots of food, wine and laughter. My mom and I planned out a menu the weekend before Christmas and wanted something special for Christmas eve dinner. We almost always do beef tenderloin on special occasions, so we wanted to try something different, and prime rib fit the bill! Of course, we made Lane cook it. He often gets volun-told to cook, but I think he likes it! We found a basic prime rib recipe online and added our own little touches. It was delicious and really so easy. The meal was fabulous, as always!
    2011 040
    Prime Rib slightly adapted from Simply Recipes
    (The link has GREAT pictures to go with the recipe)
    Ingredients
    • One standing rib roast, 3 to 7 ribs (estimate serving 2 people per rib), bones cut away from the roast and tied back to the roast with kitchen string (ask your butcher to prepare the roast this way)
    • Salt and freshly ground black pepper
    • Garlic Powder
    • Rosemary springs
    Directions
    Remove roast from the refrigerator, loosely wrapped, 3 hours before cooking. Roasts should always be brought close to room temperature first, before they go in the oven.

    Cookbooks often call for the excess fat to be removed. By "excess" fat they mean any fat more than an inch thick. The fat is what provides the flavor and what you are paying for with prime rib, so you want to leave it on. Your butcher should have removed any excess fat.

    If your butcher hasn't already done so, cut the bones away from the roast and tie them back on to the roast with kitchen string. This will make it much easier to carve the roast, while still allowing you to stand the roast on the rib bones while cooking. Basically, you cut the ribs away then tie them right back on. It helps provide the flavor, but makes it easier to carve when you’re ready to serve.

    Preheat your oven to 500°F, or the highest it will go (our oven goes up to 700°F, which is too hot). Generously sprinkle salt, garlic powder and pepper all over the roast. Cut slits in the top of the roast and insert small springs of rosemary.

    Insert a meat thermometer into the thickest part of the roast, making sure it doesn't touch a bone. (Some meat thermometers require that you poke a hole first with a skewer, and then insert the thermometer.) Place the roast, fat side up, rib side down in a roasting pan in the oven.

    After 15 minutes on 500°F, reduce the heat to 325°F. To figure out the total cooking time, allow about 13-15 minutes per pound for rare and 15-17 minutes per pound for medium rare. The actual cooking time will depend on the shape of the roast and your particular oven. A flatter roast will cook more quickly than a thicker one. So make sure to use a meat thermometer. This is not a roast to "wing it". Error on the rare side.

    Roast in oven until thermometer registers 115°-120°F for rare or 125°-130°F for medium.
    Check the temperature of the roast using a meat thermometer a half hour before you expect the roast to be done. For example, with a 10 pound roast, you would expect 2 1/2 hours of total cooking time (15 minutes at 500° and 2 1/4 hours at 325°). In this case, check after 2 hours of total cooking time, or 1 hour 45 minutes after you lowered the oven temp to 325°.

    Once the roast has reached the desired internal temperature, remove it from oven and let rest 20 minutes, covered with aluminum foil, before carving. The roast will continue to cook while it is resting.  (I think we let it rest a little too long, so just watch your temp. We prefer it to be on the more rare side.)

    With a knife or scissors, cut the strings which attach the meat to the bones. Remove the bones (save for making stock for soup. Then, using a sharp carving knife, slice meat across the grain for serving, making the slices about 1/4-1/2 inch thick.

    DELICIOUSO and oh so easy. It takes some advance thought, but the actual preparation is really easy. Just make sure you have a great (and accurate) meat thermometer that you can constantly watch the temperature on.

    Here’s Jax wondering what happened to his portion of prime rib, but then settling with a bowl of bacon bits. (No, we didn’t actually give him the bacon.)
    photo_2[1]
    We served the prime rib with a wedge salad, baked potato and sourdough bread. For dessert, we had apple pie and honey lavender vanilla bean ice cream (recipe to come).

    Oh, and the wine. Let’s not forget the wine. Several years ago, my dad said to my mom and me, “Well, if I die, you can sell all of the wine.” Mom and I looked at each other, paused, and at the same time said, “We won’t sell it…we’re going to drink it!!!”

    So, from then on, my dad realized that if he wanted in on his own wine, then he should start opening it now! We’ve convinced him to open even more by saying that we’ll just have to go back to Napa to get more. Whatever the thought is behind the decision to open more wine makes no difference to me…I’m just glad I get to partake!

    On Christmas eve, we opened two bottles…A 2003 Silver Oak Alexander Valley Cabernet and a 2004 Sullivan Vineyards Cabernet. These are my two FAVORITE wines. Not only are they wonderful to taste, but since I’ve been to both vineyards, drinking them brings back such wonderful memories.

    Silver Oak has been a long time favorite of my parents and, therefore has become a favorite of me and Lane. The last time we went, part of their property had burned and we tasted in a portable building. They were in the process of rebuilding so I can’t wait to go back and see their new facility.

    Sullivan is actually right across the street from Silver Oak and we first went in on a whim because my dad had a good friend whose last name is Sullivan. We thought it would be fun to get him a bottle of it, not knowing what we were tasting. That was in 2001. When we walked up to the barn (because there was no tasting room) Mr. Sullivan, with his handlebar mustache, greeted us and immediately treated us like family….and the wine, well it just happened to be FANTASTIC. I’ve never forgotten that experience. When we went back in 2008, Mr. Sullivan had since passed away and they had an official tasting room, but we still had the same experience…greeted by the old, white faced golden retriever and Mr. Sullivan’s son inviting us into their family home. Can’t wait to go back.
    2011 038
    It was a wonderful Christmas and I’m so thankful for my parents. They have created an amazing example of what marriage should be and we are forever grateful to them for that.

    And, just because I promised and I know you’re on pins and needles waiting for pictures of cute puppies…here you go!

    Jax in his monster sweater.
    2011 003 2011 025

    Sleepy Lane and Jax on Christmas day. (Jax now sporting his cable knit fisherman’s sweater)
    2011 033
    2011 034

    Reindeer Knox
    2011 001

    Poor baby Jax had a toenail ripped off and had to have a little bandage put on. It also couldn’t get wet so we had to wrap a baggie around it when he went outside. I told him I wouldn’t put the picture on the internet, but oh well. Sorry King! Don’t banish me!
    image

    Wednesday, January 12, 2011

    Cookies and Cream Cupcakes and Cocktails!

    Posted by LeighAnne at 8:48 PM 0 comments

    (So, I have so many things to post about from Christmas, but I’m waiting on some pictures taken with my mom’s camera. So, stay tuned for vanilla bean lavender ice cream, chocolate icebox pie, prime rib and, of course, pictures of dogs wearing clothes!!)

    166809_10150121413093083_697128082_7955745_6594462_n

    We had our monthly (well, sometimes it goes more than a month) Cupcakes and Cocktails at Melanie’s house last week. We were just planning to have a laid back party, so I thought these cupcakes would be perfect. They were easy to make and who doesn’t love cookies and cream?

    I think I over-baked them because they were pretty dense, which is not my preference when it comes to cupcakes. I just couldn’t get the center to set enough to get a toothpick to come out clean. I ended up baking them for about 22 minutes. They weren’t my favorite that I’ve made, but everyone really seemed to like them. I might try again, but I will reduce the baking time to 18 minutes and go from there.

    Cookies and Cream Cupcakes from Annie’s Eats

    Yield: 24 cupcakes
    Ingredients:
    For the cupcakes:
    24 Oreo halves, with cream filling attached (I used an entire box of Oreos for the whole recipe)
    2¼ cups all-purpose flour
    1 tsp. baking powder
    ½ tsp. salt
    8 tbsp. unsalted butter, at room temperature
    1 2/3 cup sugar
    3 large egg whites, at room temperature
    2 tsp. vanilla extract
    1 cup milk
    20 Oreo cookies, coarsely chopped (I just put them in a bag and beat them with the handle of a knife to get large chunks.)

    For the frosting:
    8 oz. cream cheese, at room temperature
    6 tbsp. unsalted butter, at room temperature (I used 8T. butter)
    1 tbsp. vanilla extract
    4 cups confectioners’ sugar, sifted
    2 tbsp. heavy cream (I would cut this down to 1T. next time. The icing was a tid bit runny, even after refrigerating for a while.)

    For garnish:
    Oreo cookie crumbs
    24 Oreo cookie halves (I, for the life of me, couldn’t cut the Oreos in half and make them not crack. I tried everything. Hence, some of them looking really gnarly!)

    Directions:
    Preheat the oven to 350˚ F.  Line the wells of two cupcake pans with 24 paper liners.  Place an Oreo halve in the bottom of each liner, cream side up. (I would not do this next time. It was just kind of weird to me, but again, everyone else loved them.) In a medium bowl, combine the flour, baking powder and salt; stir together with a fork to blend and set aside.  In the bowl of an electric mixer, combine the butter and sugar and beat together on medium-high speed until light and fluffy, about 2 minutes.  Blend in the egg whites one at a time, beating well after each addition.  Blend in the vanilla extract.  With the mixer on low speed, beat in half of the dry ingredients just until incorporated.  Add the milk and beat just until combined, then mix in the remaining dry ingredients.  Gently fold in the chopped Oreos with a rubber spatula until evenly incorporated, being careful not to over-mix.

    Evenly divide the batter between the prepared cupcake liners.  Bake for 18-20 minutes, rotating the pans halfway through baking, until a toothpick inserted in the center comes out clean.  Allow to cool in the pans 5-10 minutes, then transfer to a wire rack to cool completely.

    To make the frosting, combine the cream cheese and butter in the bowl of an electric mixer and beat on medium-high speed until smooth, about 1 minute.  Blend in the vanilla extract.  Beat in the confectioners’ sugar until incorporated and smooth, 1-2 minutes.  Add the heavy cream to the bowl and beat on medium-low speed just until incorporated, then increase the speed to medium-high and whip for 4 minutes until light and fluffy, scraping down the sides of the bowl as needed.

    Frost the cooled cupcakes as desired.  Sprinkle with Oreo crumbs and garnish with Oreo halves.

    And, I can’t talk about a C&C and not post pics!

    Caroline joined in the fun!

    166478_10150121413038083_697128082_7955744_4338805_n

    My favorite girls! (Erin, we miss you!!)

    164739_10150121413183083_697128082_7955747_1899281_n

    Sunday, December 12, 2010

    Cookie Monster

    Posted by LeighAnne at 7:33 PM 0 comments

    2010 399

    One of my and Lane’s favorite things is a cookie cake from Great American Cookie Company. They are just pure deliciousness. We normally get them for each other’s birthday and that’s our fix for the entire year. Well, the other day, Lane asked if I could make one. I thought, “Sure. I’ll make it and you can take it to work, because there’s no way we can eat a cookie cake by ourselves.”

    Famous. Last. Words Thoughts. Not only did I make it, but we ate the entire thing! YIKES! It stayed fresh for over a week and we would nibble on it after dinner or for breakfast (don’t judge. cookie cake for breakfast is the best.)

    I just searched for Cookie Cake recipes and this one seemed easy and quick, so it was the winner. Simple and delicious. I didn’t ice it, but you certainly could and I can only imagine how the delicious factor would rise.

    Giant Chocolate Chip Cookie from Allrecipes.com

    1 c. butter, softened

    3/4 c. granulated sugar

    3/4 c. brown sugar, packed

    1 T. vanilla extract

    2 eggs

    2 1/4 c. AP flour

    1 t. salt

    1 t. baking soda

    2 c. semisweet chocolate chips

    1 c. chopped walnuts (I omitted)

    In a large bowl, beat butter, sugars and vanilla until light and fluffy. Add eggs, one at a time, beating well. Gradually add flour, salt and baking soda, beating until well blended. Stir in chocolate chips and nuts (if desired). Spread in a greased 14” round pizza pan. Bake at 375 degrees for 20-25 minutes. Cook cookie in pan on a cooling rack. Decorate as desired.

    And, completely unrelated, but for your viewing pleasure, HEEEEEERE’S KNOX! He’s ready for Santa!

    2010 402 2010 404 2010 406

    Sunday, December 5, 2010

    I am so thankful…

    Posted by LeighAnne at 7:42 PM 0 comments

    I know it’s after Thanksgiving, and I’ve said it before, but I am SO thankful for the wonderful friends that God has blessed me with.  I am thankful for the humor and laughter that seems endless when we get together. I am thankful for their daily prayer and support, with Christ at the center of it all. I am thankful for the fact that we have all known each other for at least 10 years, and that they know me sometimes better than I know myself. I am thankful that I can share anything with them and know that they won’t judge me. I am thankful that we can come up with any reason possible to get together for girl’s nights! One of those nights was to celebrate Thanksgiving. We haven’t really done it before, but I just thought it would be a fun thing to do this year.

    If you’ve ever been to my house, you know that it’s REALLY small, REALLY old (and not updated) and constantly dusty. But, for some reason, I love it! I love to entertain in it as well. I feel a certain connection to the house. It was built in 1940 and I feel like we are re-creating times shared by the original owners over 70 years ago. So, I volunteered to host our girls Thanksgiving Pot-Luck dinner. 

    We’ve been planning it since August, it seems. We worked out a menu and it was set! I got really excited about my table setting. I’ve never hosted Thanksgiving before, so I had a fun time playing around with the table. With the help of some BEAUTIFUL dishes from Williams Sonoma Home that Erin brought, I think the table ended up being pretty darn fabulous. 2010 385

    2010 386 

    I have NO idea how I’ll create my Christmas table now after putting so much thought into this. Maybe I’ll have it down by December 25th!

    Back to girl’s night… all of the food was just AMAZING! I have some talented friends who love food as much as I do!

    Appetizers: Cranberry salsa with blue corn tortilla chips from Mary C. and Banner’s famous artichoke dip

    Salad and rolls: Spinach with blue cheese, spiced almonds, mango and avocados with a Balsamic Vinaigrette from Jill

    Turkey: FRIED turkey from Melanie’s talented husband, Joe

    Sides: Erin’s AMAZING sweet potato casserole, Melanie’s delicious confetti corn and I made Lane’s famous mashed potatoes

    Desserts: Mini cheesecakes from Mary C. and Banner made the cutest things I’ve ever seen…Turkey cookie dough truffles..

    banner turkey

    After our wonderful dinner, we sat around, drank pumpkin pie martinis and enjoyed each other’s company…oh, and took timer pictures with our cameras…

    2010 395 2010 390 2010 392 

    So, just to say it again…I am so thankful. So stinking thankful.

    Sunday, November 28, 2010

    Whoopie Pies for Daddy!

    Posted by LeighAnne at 7:41 PM 0 comments

    My dad likes those Moon Pie things…you know, the really highly processed, not very tasty (in my humble opinion), plastic wrapped desserts?

    I think they are pretty gross, but he LOVES them! He’s loved them since he was a kid. Over Thanksgiving, I planned to spend a few nights with them and wanted to make him a dessert that he REALLY would like, and that weren’t Moon Pies.

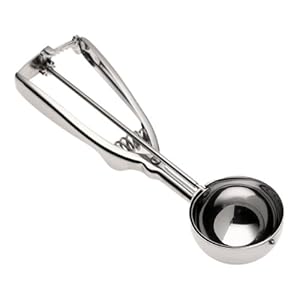
    I’ve seen all the latest craze concerning whoopie pies, so of course I had to try them. These turned out perfectly! The “cookie” part is very cake-like and moist. The filling is light and fluffy and a perfect compliment to the cake. When I dished the cookies onto the cookie sheet, I used a large “disher” (one of these things….)Norpro Stainless Steel Scoop, 56MM (4 Tablespoon)

    The cookie/cake things turned out kind of large, so next time, I’ll use a  smaller disher and get a smaller whoopie pie.

    In the end, Daddy LOVED the whoopie pies! He had one every day I was there. Even my mom liked them, and she doesn’t like a lot of sweets. My next whoopie pie adventure…Red Velvet!

    Chocolate Whoopie Pies from Gourmet

    2010 397
    For cakes
    • 2 cups all-purpose flour
    • 1/2 cup Dutch-process cocoa powder
    • 1 1/4 teaspoon baking soda
    • 1 teaspoon salt
    • 1 cup well-shaken buttermilk
    • 1 teaspoon vanilla
    • 1 stick (1/2 cup) unsalted butter, softened
    • 1 cup packed brown sugar
    • 1 large egg
    For filling
    • 1 stick (1/2 cup) unsalted butter, softened
    • 1 1/4 cups confectioners sugar
    • 1 cup marshmallow cream such as Marshmallow Fluff
    • 1 teaspoon vanilla
    Make cakes:
    • Preheat oven to 350ºF.

    • Whisk together flour, cocoa, baking soda, and salt in a bowl until combined. Stir together buttermilk and vanilla in a small bowl.

    • Beat together butter and brown sugar in a large bowl with an electric mixer at medium-high speed until pale and fluffy, about 3 minutes in a standing mixer or 5 minutes with a handheld, then add egg, beating until combined well. Reduce speed to low and alternately mix in flour mixture and buttermilk in batches, beginning and ending with flour, scraping down side of bowl occasionally, and mixing until smooth.

    • Spoon 1/4-cup mounds of batter about 2 inches apart onto 2 large baking sheets covered in parchment paper. Bake in upper and lower thirds of oven, switching position of sheets halfway through baking, until tops are puffed and cakes spring back when touched, 11 to 13 minutes. Transfer with a metal spatula to a rack to cool completely.

    Make filling:
    • Beat together butter, confectioners sugar, marshmallow, and vanilla in a bowl with electric mixer at medium speed until smooth, about 3 minutes.

    Assemble pies:
    • Spread a rounded tablespoon filling on flat sides of half of cakes and top with remaining cakes.

    Cook's Notes:

    • Cakes can be made 3 days ahead and kept, layered between sheets of wax paper, in an airtight container at room temperature.
    • Filling can be made 4 hours ahead and kept, covered, at room temperature.

    Saturday, November 20, 2010

    Cheers and Beers! Lane’s 30th

    Posted by LeighAnne at 8:37 PM 0 comments

    It’s official. My husband is in his thirties! Does this make me a trophy wife?? Lane insisted that nothing BIG was planned for his birthday. He just wanted a nice dinner at home and then to go to Waco and tailgate for the Baylor vs A&M football game. I begrudgingly obliged. I did want to do a bunch of little things because, let’s be honest, this is a big birthday! If he didn’t want to go big, then I would do lots of little things that could add up to be big… On Thursday, I had my 7th period kids call him and, all together, say “Happy last day of your 20’s!”. That evening, we ordered Italian food from our favorite local joint, ate dinner by the fire and had lots of wine. It was a nice birthday eve.

    On Friday, his birthday, I took the day off and spent it in the kitchen where I’m most happy, especially cooking for him. It started with breakfast, where his request was biscuits and gravy with an over-easy egg on top! Ok?! I can do that. I haven’t mastered eggs yet. They say that while eggs seem like the most simple thing to cook, they are actually one of the hardest. I believe it. I was really nervous to try to flip the egg in my pan, but it worked! Lane and I were both shocked! So, the day started off with a good breakfast…

    2010 361

    He left after breakfast to run errands and do a little work, so I put fun sticky notes all over the house. They started at the front door with “30 reasons I’m glad you were born”. It then led him on a little scavenger hunt around the house. It was fun, and “not too big”.

    That evening, we planned dinner at home. On the menu, we had:

    -Bungalow Salad

    -Baked Potatoes

    -Filet Mignon

    -Sour Cream Apple Pie

    (All recipes previously posted) except the baked potato recipe.

    I have a confession. This is shameful. Very shameful. Are you ready??


    I’ve never baked a potato before!!! SHHH…


    I just don’t prefer baked potatoes. I will eat them, but prefer mashed instead. Lane, is the opposite. So when he asked for baked potatoes I had to call my mom and ask (which I immediately forgot what she said) and then had to rely on the internet. Thankfully, the internet let me to Alton Brown, which led me to the perfect baked potato.

    2010 374

    Baked Potatoes courtesy of Alton Brown

    1 large russet potato (If it looks like Mr. Potato Head(r), you've got the right one.)

    Canola oil to coat

    Kosher salt

    Heat oven to 350 degrees and position racks in top and bottom thirds. Wash potato (or potatoes) thoroughly with a stiff brush and cold running water. Dry, then using a standard fork poke 8 to 12 deep holes all over the spud so that moisture can escape during cooking. Place in a bowl and coat lightly with oil. Sprinkle with kosher salt and place potato directly on rack in middle of oven. Place a baking sheet on the lower rack to catch any drippings.

    Bake 1 hour or until skin feels crisp but flesh beneath feels soft. Serve by creating a dotted line from end to end with your fork, then crack the spud open by squeezing the ends towards one another. It will pop right open. But watch out, there will be some steam.

    NOTE: If you're cooking more than 4 potatoes, you'll need to extend the cooking time by up to 15 minutes.

    Served with cheese, sour cream, bacon bits and green onions.

    With dinner,  we opened up a bottle of wine that I bought in Napa Valley, days after Lane and I got engaged. I bought it at Merryvale, which is where we planned to have our rehearsal dinner. Sadly, our plans to marry in Napa Valley were changed due to a significant amount of family that wouldn’t be able to make it.  However, I still have such great memories of Merryvale and can’t wait to take Lane there one day! He’s had their wine several times before and requested this bottle for his birthday. I agreed, only on the notion that we’d have to go back soon and get more!
    2010 372

    For your viewing pleasure, here’s a peek at the Merryvale Cask Room…Someday, we hope to have an anniversary party there to make up for our planned rehearsal dinner that we had to cancel.

    DSC_0364

    We went to bed that evening, fat and happy!

    2010 375

    The next day, we packed up the car and headed to Waco for the A&M/Baylor football game. Lane and I have been to every A&M/Baylor game together, except for one, since we met six years ago. So this was a fun way to end his birthday weekend.

    2010 376

    We have good friends that own a school bus that’s been converted to an RV and painted green and gold! They take it to most home games in Waco and we planned to tailgate with them. I made a few snacks for the day since we wouldn’t really be able to eat a real meal. It was really fun to see a bunch of RANDOM people crowded around our table scarfing down my food. It was flattering! I made Pumpkin Cream Cheese dip, Caramelized Onion Dip, Banana Nut Bread and S’Mores Cupcakes (recipes below).

    We had such a fun weekend and Lane said it was a great birthday. We were so happy to share it with friends. My friends, Banner and Jill came down to celebrate, as well as Lane’s best friend (and Baylor Bear!) Raymond and his girlfriend, Ashleigh. We were blessed to share the day with them.

    2010 377

    Jill, Banner and Me, holding our “Beers and Cheers, Lane’s 30” cups I had made!

    raymond and ashleigh

    Raymond and Ashleigh

    What a great birthday weekend! Happy Birthday to my best friend, husband and partner! I love you!

    Recipes

    Pumpkin Cream Cheese Dip from Creating Nirvana

    (sorry, no picture. Just imagine an orange dip!)

    2 cups of roasted pumpkin puree or canned pumpkin puree
    1 8 ounce package of cream cheese, room temperature
    1 tsp cinnamon
    ¼ tsp ground ginger
    ¼ tsp ground cloves
    ¼ cup brown sugar

    Blend all the ingredients together. Chill in the refrigerator for 1 hour before serving. Serve with crackers or fruit.

    (I served it with pretzels and really liked it!) This was so easy. I’ll definitely make it again.

    Caramelized Onion Dip from Rachel Ray, via Peace, Love and French Fries

    2010 362

    1 tbsp olive oil
    1 tbsp butter
    2 large onions, chopped
    2 cloves garlic, minced
    1 tsp thyme
    1 beef bouillon cube
    1/2 cup water
    2 tsp Worcestershire sauce
    16 oz sour cream (I used reduced fat)
    3 oz cream cheese, softened (I used reduced fat)


    Heat butter and oil in a medium saucepan over medium heat (I went between medium and medium-low). Cook onions and garlic until soft and brown, between 20-20 minutes, stirring every 3-4 minutes.
    Add beef bouillon and water, cook until mixture is combined. Season with Worcestershire sauce, thyme, salt and pepper to taste. Stir until combined. Cool and refrigerate mixture.
    Combine sour cream and cream cheese, stir until smooth. Add chilled onion mixture and stir to combine. Chill for at least 30 minutes before serving.

    THIS IS DELICIOUS! I served it with the Cracked Pepper Triscuits, and they were perfect with it. It was GONE by the end of the tailgate.

    Banana Nut Bread from Thyme and Traditions Cookbook (Glenwood Church of Christ in Tyler, Texas)

    2010 367

    1/2 c. Sugar

    2 Eggs

    2 c. Flour

    1 tsp. baking soda

    3/4 c. buttermilk

    3 medium bananas, mashed

    1 c. nuts (I used pecans)

    1 tsp. vanilla

    Cream sugar and eggs until fluffy. Sift together flour and baking soda, then add to butter and sugar. Ad buttermilk, bananas, nuts and vanilla. Bake 50 minutes at 350 until done.

    I can’t tell you how this tasted, because, well, I never got any! I set it on the table and never saw it again! Who knows. So, if you had any or make it, let me know! I’m sure I’ll make it again soon, though, because I always have leftover bananas from my lunch. (I only like green bananas! I don’t like when they brown!)

    S’Mores Cupcakes

    (I don’t know where I found this recipe, so I can’t site a source! I’m so sorry. If it’s yours, let me know. I’ll be happy to credit you.)

    2010 381

    Graham Cracker & Milk Chocolate Cupcakes
    1 cup all-purpose flour
    1 cup finely crushed graham crackers

    2 teaspoons baking powder
    1 teaspoon salt (I reduced this to 1/2 tsp)
    1/2 cup (1 stick) unsalted butter, room temperature
    3/4 cup sugar
    2 eggs
    1 teaspoon vanilla extract
    3/4 cup milk (room temp)
    4 hershey's milk chocolate bars (I pulsed mine in the food processor to make them a lot smaller)


    Swiss Meringue Marshmallow Frosting (NOT BUTTERCREAM)
    1 1/4 cups granulated sugar
    4 egg whites
    1-2 teaspoons vanilla extract (optional)
    1. Preheat oven to 350°F.
    2. Mix flour, crushed graham crackers, baking powder, and salt together and set aside.
    3. Cream butter and sugar until light and fluffy. Add eggs, one at a time, mixing well after each addition. Add vanilla. Alternately add flour mixture and milk and beat until batter is almost smooth. Fold in chocolate chips.
    4. Spoon batter into cupcake papers, filling cups about 2/3 full. Bake for 20-25 minutes or until a tester inserted into the center comes out clean. Remove from oven and cool.
    5. To make the frosting: Combine egg whites and sugar in the top of a double boiler (or a glass bowl over but not touching a pan of simmering water). Whisk constantly over medium-high heat until mixtures reaches 160°F, about 5 minutes. Pour egg white mixture into the bowl of a stand mixer fitted with the whisk attachment. Beat on high for 6 minutes or until room temperature. Add optional vanilla extract 1 teaspoon at a time until desired flavor.
    6. Frost cooled cupcakes and sprinkle with grated milk chocolate or graham cracker crumbs.

    I actually ran out of eggs, and didn’t make the meringue frosting. I ended up making just a basic cream cheese/buttercream icing. I also molded hershey’s into the lego shape with a lego ice tray! Lane LOVED Legos as a child, so I thought it was a fun touch.

    Sunday, January 23, 2011

    Honey.Lavender.Vanilla.Bean.Ice.Cream.


    Yes, yes, that’s what I said. Honey Lavender Vanilla Bean Ice Cream. We first tried it at our favorite restaurant, Hibiscus, but I was always intimidated to use lavender to cook with. Well, this Christmas, I made lavender sachets and lavender bath scrubs for my mom and Lane’s mom and had some of the lovely flower left over. I had no excuse to not try the ice cream!  It was made easy by my mom’s ice cream maker.

    I will definitely have one of these babies on my wish list as summer rolls around. Speaking of summer….Can it come soon, please?

    Anyway, I’ve only made one ice cream before and it was really easy. This one seemed a little bit more laborious, but still relatively easy.

    As far as taste goes, it was definitely lavender-y. I think next time, I would use less lavender and more honey. It was a little bitter because of the lavender. Maybe I let it steep for too long. Not sure. We served it, however, with the Sour Cream Apple Pie which is plenty sweet and it worked really well with that. It’s not an ice cream that you would sit in front of the TV and have a bowl of, but served with the right thing, it works well.

    The mixture in the saucepan ready to steep.

    2011 031

    Honey Lavender Vanilla Bean Ice Cream adapted from Martha Stewart

  • 2 cups whole milk
  • 1/4 cup dried lavender (I purchased in the Bulk section of my Central Market)
  • 1 whole vanilla bean, split and scraped
  • 1/3 cup honey
  • 5 large egg yolks
  • 1/4 cup sugar
  • 1 cup heavy cream
    1. In a medium saucepan, combine milk, lavender, vanilla bean and honey. Bring to a gentle boil, cover, and remove from heat. Let steep for 5 minutes. Strain mixture, reserving milk and discarding lavender.
    2. Combine egg yolks and sugar in the bowl of an electric mixer. Beat on medium-high speed until very thick and pale yellow, 3 to 5 minutes. Meanwhile, return milk to a medium saucepan, and bring to a simmer over medium-low heat.
    3. Add half the milk to egg-yolk mixture, and whisk until blended. Stir mixture into remaining milk, and cook over low heat, stirring constantly, until mixture is thick enough to coat the back of a wooden spoon.
    4. Remove from heat, and immediately stir in cream. Strain mixture into a medium mixing bowl set in an ice-water bath, and let stand until chilled, stirring from time to time. Freeze in an ice-cream maker according to manufacturer's instructions. Store in an airtight plastic container up to 2 weeks.

  • Continue reading...

    Wednesday, January 19, 2011

    Christmas Dinner with Sheriff John, the Mrs. and, of course, Jax


    This Christmas I was able to spend 10 days with my parents. Most people might grumble about that, but I absolutely loved it! I have amazing parents who are fun and thoughtful and loving and oh so very generous. Lane joined us for 5 of the 10 days, and we had a wonderful time filled with lots of food, wine and laughter. My mom and I planned out a menu the weekend before Christmas and wanted something special for Christmas eve dinner. We almost always do beef tenderloin on special occasions, so we wanted to try something different, and prime rib fit the bill! Of course, we made Lane cook it. He often gets volun-told to cook, but I think he likes it! We found a basic prime rib recipe online and added our own little touches. It was delicious and really so easy. The meal was fabulous, as always!
    2011 040
    Prime Rib slightly adapted from Simply Recipes
    (The link has GREAT pictures to go with the recipe)
    Ingredients
    • One standing rib roast, 3 to 7 ribs (estimate serving 2 people per rib), bones cut away from the roast and tied back to the roast with kitchen string (ask your butcher to prepare the roast this way)
    • Salt and freshly ground black pepper
    • Garlic Powder
    • Rosemary springs
    Directions
    Remove roast from the refrigerator, loosely wrapped, 3 hours before cooking. Roasts should always be brought close to room temperature first, before they go in the oven.

    Cookbooks often call for the excess fat to be removed. By "excess" fat they mean any fat more than an inch thick. The fat is what provides the flavor and what you are paying for with prime rib, so you want to leave it on. Your butcher should have removed any excess fat.

    If your butcher hasn't already done so, cut the bones away from the roast and tie them back on to the roast with kitchen string. This will make it much easier to carve the roast, while still allowing you to stand the roast on the rib bones while cooking. Basically, you cut the ribs away then tie them right back on. It helps provide the flavor, but makes it easier to carve when you’re ready to serve.

    Preheat your oven to 500°F, or the highest it will go (our oven goes up to 700°F, which is too hot). Generously sprinkle salt, garlic powder and pepper all over the roast. Cut slits in the top of the roast and insert small springs of rosemary.

    Insert a meat thermometer into the thickest part of the roast, making sure it doesn't touch a bone. (Some meat thermometers require that you poke a hole first with a skewer, and then insert the thermometer.) Place the roast, fat side up, rib side down in a roasting pan in the oven.

    After 15 minutes on 500°F, reduce the heat to 325°F. To figure out the total cooking time, allow about 13-15 minutes per pound for rare and 15-17 minutes per pound for medium rare. The actual cooking time will depend on the shape of the roast and your particular oven. A flatter roast will cook more quickly than a thicker one. So make sure to use a meat thermometer. This is not a roast to "wing it". Error on the rare side.

    Roast in oven until thermometer registers 115°-120°F for rare or 125°-130°F for medium.
    Check the temperature of the roast using a meat thermometer a half hour before you expect the roast to be done. For example, with a 10 pound roast, you would expect 2 1/2 hours of total cooking time (15 minutes at 500° and 2 1/4 hours at 325°). In this case, check after 2 hours of total cooking time, or 1 hour 45 minutes after you lowered the oven temp to 325°.

    Once the roast has reached the desired internal temperature, remove it from oven and let rest 20 minutes, covered with aluminum foil, before carving. The roast will continue to cook while it is resting.  (I think we let it rest a little too long, so just watch your temp. We prefer it to be on the more rare side.)

    With a knife or scissors, cut the strings which attach the meat to the bones. Remove the bones (save for making stock for soup. Then, using a sharp carving knife, slice meat across the grain for serving, making the slices about 1/4-1/2 inch thick.

    DELICIOUSO and oh so easy. It takes some advance thought, but the actual preparation is really easy. Just make sure you have a great (and accurate) meat thermometer that you can constantly watch the temperature on.

    Here’s Jax wondering what happened to his portion of prime rib, but then settling with a bowl of bacon bits. (No, we didn’t actually give him the bacon.)
    photo_2[1]
    We served the prime rib with a wedge salad, baked potato and sourdough bread. For dessert, we had apple pie and honey lavender vanilla bean ice cream (recipe to come).

    Oh, and the wine. Let’s not forget the wine. Several years ago, my dad said to my mom and me, “Well, if I die, you can sell all of the wine.” Mom and I looked at each other, paused, and at the same time said, “We won’t sell it…we’re going to drink it!!!”

    So, from then on, my dad realized that if he wanted in on his own wine, then he should start opening it now! We’ve convinced him to open even more by saying that we’ll just have to go back to Napa to get more. Whatever the thought is behind the decision to open more wine makes no difference to me…I’m just glad I get to partake!

    On Christmas eve, we opened two bottles…A 2003 Silver Oak Alexander Valley Cabernet and a 2004 Sullivan Vineyards Cabernet. These are my two FAVORITE wines. Not only are they wonderful to taste, but since I’ve been to both vineyards, drinking them brings back such wonderful memories.

    Silver Oak has been a long time favorite of my parents and, therefore has become a favorite of me and Lane. The last time we went, part of their property had burned and we tasted in a portable building. They were in the process of rebuilding so I can’t wait to go back and see their new facility.

    Sullivan is actually right across the street from Silver Oak and we first went in on a whim because my dad had a good friend whose last name is Sullivan. We thought it would be fun to get him a bottle of it, not knowing what we were tasting. That was in 2001. When we walked up to the barn (because there was no tasting room) Mr. Sullivan, with his handlebar mustache, greeted us and immediately treated us like family….and the wine, well it just happened to be FANTASTIC. I’ve never forgotten that experience. When we went back in 2008, Mr. Sullivan had since passed away and they had an official tasting room, but we still had the same experience…greeted by the old, white faced golden retriever and Mr. Sullivan’s son inviting us into their family home. Can’t wait to go back.
    2011 038
    It was a wonderful Christmas and I’m so thankful for my parents. They have created an amazing example of what marriage should be and we are forever grateful to them for that.

    And, just because I promised and I know you’re on pins and needles waiting for pictures of cute puppies…here you go!

    Jax in his monster sweater.
    2011 003 2011 025

    Sleepy Lane and Jax on Christmas day. (Jax now sporting his cable knit fisherman’s sweater)
    2011 033
    2011 034

    Reindeer Knox
    2011 001

    Poor baby Jax had a toenail ripped off and had to have a little bandage put on. It also couldn’t get wet so we had to wrap a baggie around it when he went outside. I told him I wouldn’t put the picture on the internet, but oh well. Sorry King! Don’t banish me!
    image
    Continue reading...

    Wednesday, January 12, 2011

    Cookies and Cream Cupcakes and Cocktails!


    (So, I have so many things to post about from Christmas, but I’m waiting on some pictures taken with my mom’s camera. So, stay tuned for vanilla bean lavender ice cream, chocolate icebox pie, prime rib and, of course, pictures of dogs wearing clothes!!)

    166809_10150121413093083_697128082_7955745_6594462_n

    We had our monthly (well, sometimes it goes more than a month) Cupcakes and Cocktails at Melanie’s house last week. We were just planning to have a laid back party, so I thought these cupcakes would be perfect. They were easy to make and who doesn’t love cookies and cream?

    I think I over-baked them because they were pretty dense, which is not my preference when it comes to cupcakes. I just couldn’t get the center to set enough to get a toothpick to come out clean. I ended up baking them for about 22 minutes. They weren’t my favorite that I’ve made, but everyone really seemed to like them. I might try again, but I will reduce the baking time to 18 minutes and go from there.

    Cookies and Cream Cupcakes from Annie’s Eats

    Yield: 24 cupcakes
    Ingredients:
    For the cupcakes:
    24 Oreo halves, with cream filling attached (I used an entire box of Oreos for the whole recipe)
    2¼ cups all-purpose flour
    1 tsp. baking powder
    ½ tsp. salt
    8 tbsp. unsalted butter, at room temperature
    1 2/3 cup sugar
    3 large egg whites, at room temperature
    2 tsp. vanilla extract
    1 cup milk
    20 Oreo cookies, coarsely chopped (I just put them in a bag and beat them with the handle of a knife to get large chunks.)

    For the frosting:
    8 oz. cream cheese, at room temperature
    6 tbsp. unsalted butter, at room temperature (I used 8T. butter)
    1 tbsp. vanilla extract
    4 cups confectioners’ sugar, sifted
    2 tbsp. heavy cream (I would cut this down to 1T. next time. The icing was a tid bit runny, even after refrigerating for a while.)

    For garnish:
    Oreo cookie crumbs
    24 Oreo cookie halves (I, for the life of me, couldn’t cut the Oreos in half and make them not crack. I tried everything. Hence, some of them looking really gnarly!)

    Directions:
    Preheat the oven to 350˚ F.  Line the wells of two cupcake pans with 24 paper liners.  Place an Oreo halve in the bottom of each liner, cream side up. (I would not do this next time. It was just kind of weird to me, but again, everyone else loved them.) In a medium bowl, combine the flour, baking powder and salt; stir together with a fork to blend and set aside.  In the bowl of an electric mixer, combine the butter and sugar and beat together on medium-high speed until light and fluffy, about 2 minutes.  Blend in the egg whites one at a time, beating well after each addition.  Blend in the vanilla extract.  With the mixer on low speed, beat in half of the dry ingredients just until incorporated.  Add the milk and beat just until combined, then mix in the remaining dry ingredients.  Gently fold in the chopped Oreos with a rubber spatula until evenly incorporated, being careful not to over-mix.

    Evenly divide the batter between the prepared cupcake liners.  Bake for 18-20 minutes, rotating the pans halfway through baking, until a toothpick inserted in the center comes out clean.  Allow to cool in the pans 5-10 minutes, then transfer to a wire rack to cool completely.

    To make the frosting, combine the cream cheese and butter in the bowl of an electric mixer and beat on medium-high speed until smooth, about 1 minute.  Blend in the vanilla extract.  Beat in the confectioners’ sugar until incorporated and smooth, 1-2 minutes.  Add the heavy cream to the bowl and beat on medium-low speed just until incorporated, then increase the speed to medium-high and whip for 4 minutes until light and fluffy, scraping down the sides of the bowl as needed.

    Frost the cooled cupcakes as desired.  Sprinkle with Oreo crumbs and garnish with Oreo halves.

    And, I can’t talk about a C&C and not post pics!

    Caroline joined in the fun!

    166478_10150121413038083_697128082_7955744_4338805_n

    My favorite girls! (Erin, we miss you!!)

    164739_10150121413183083_697128082_7955747_1899281_n

    Continue reading...

    Sunday, December 12, 2010

    Cookie Monster


    2010 399

    One of my and Lane’s favorite things is a cookie cake from Great American Cookie Company. They are just pure deliciousness. We normally get them for each other’s birthday and that’s our fix for the entire year. Well, the other day, Lane asked if I could make one. I thought, “Sure. I’ll make it and you can take it to work, because there’s no way we can eat a cookie cake by ourselves.”

    Famous. Last. Words Thoughts. Not only did I make it, but we ate the entire thing! YIKES! It stayed fresh for over a week and we would nibble on it after dinner or for breakfast (don’t judge. cookie cake for breakfast is the best.)

    I just searched for Cookie Cake recipes and this one seemed easy and quick, so it was the winner. Simple and delicious. I didn’t ice it, but you certainly could and I can only imagine how the delicious factor would rise.

    Giant Chocolate Chip Cookie from Allrecipes.com

    1 c. butter, softened

    3/4 c. granulated sugar

    3/4 c. brown sugar, packed

    1 T. vanilla extract

    2 eggs

    2 1/4 c. AP flour

    1 t. salt

    1 t. baking soda

    2 c. semisweet chocolate chips

    1 c. chopped walnuts (I omitted)

    In a large bowl, beat butter, sugars and vanilla until light and fluffy. Add eggs, one at a time, beating well. Gradually add flour, salt and baking soda, beating until well blended. Stir in chocolate chips and nuts (if desired). Spread in a greased 14” round pizza pan. Bake at 375 degrees for 20-25 minutes. Cook cookie in pan on a cooling rack. Decorate as desired.

    And, completely unrelated, but for your viewing pleasure, HEEEEEERE’S KNOX! He’s ready for Santa!

    2010 402 2010 404 2010 406

    Continue reading...

    Sunday, December 5, 2010

    I am so thankful…


    I know it’s after Thanksgiving, and I’ve said it before, but I am SO thankful for the wonderful friends that God has blessed me with.  I am thankful for the humor and laughter that seems endless when we get together. I am thankful for their daily prayer and support, with Christ at the center of it all. I am thankful for the fact that we have all known each other for at least 10 years, and that they know me sometimes better than I know myself. I am thankful that I can share anything with them and know that they won’t judge me. I am thankful that we can come up with any reason possible to get together for girl’s nights! One of those nights was to celebrate Thanksgiving. We haven’t really done it before, but I just thought it would be a fun thing to do this year.

    If you’ve ever been to my house, you know that it’s REALLY small, REALLY old (and not updated) and constantly dusty. But, for some reason, I love it! I love to entertain in it as well. I feel a certain connection to the house. It was built in 1940 and I feel like we are re-creating times shared by the original owners over 70 years ago. So, I volunteered to host our girls Thanksgiving Pot-Luck dinner. 

    We’ve been planning it since August, it seems. We worked out a menu and it was set! I got really excited about my table setting. I’ve never hosted Thanksgiving before, so I had a fun time playing around with the table. With the help of some BEAUTIFUL dishes from Williams Sonoma Home that Erin brought, I think the table ended up being pretty darn fabulous. 2010 385

    2010 386 

    I have NO idea how I’ll create my Christmas table now after putting so much thought into this. Maybe I’ll have it down by December 25th!

    Back to girl’s night… all of the food was just AMAZING! I have some talented friends who love food as much as I do!

    Appetizers: Cranberry salsa with blue corn tortilla chips from Mary C. and Banner’s famous artichoke dip

    Salad and rolls: Spinach with blue cheese, spiced almonds, mango and avocados with a Balsamic Vinaigrette from Jill

    Turkey: FRIED turkey from Melanie’s talented husband, Joe

    Sides: Erin’s AMAZING sweet potato casserole, Melanie’s delicious confetti corn and I made Lane’s famous mashed potatoes

    Desserts: Mini cheesecakes from Mary C. and Banner made the cutest things I’ve ever seen…Turkey cookie dough truffles..

    banner turkey

    After our wonderful dinner, we sat around, drank pumpkin pie martinis and enjoyed each other’s company…oh, and took timer pictures with our cameras…

    2010 395 2010 390 2010 392 

    So, just to say it again…I am so thankful. So stinking thankful.

    Continue reading...

    Sunday, November 28, 2010

    Whoopie Pies for Daddy!


    My dad likes those Moon Pie things…you know, the really highly processed, not very tasty (in my humble opinion), plastic wrapped desserts?

    I think they are pretty gross, but he LOVES them! He’s loved them since he was a kid. Over Thanksgiving, I planned to spend a few nights with them and wanted to make him a dessert that he REALLY would like, and that weren’t Moon Pies.

    I’ve seen all the latest craze concerning whoopie pies, so of course I had to try them. These turned out perfectly! The “cookie” part is very cake-like and moist. The filling is light and fluffy and a perfect compliment to the cake. When I dished the cookies onto the cookie sheet, I used a large “disher” (one of these things….)Norpro Stainless Steel Scoop, 56MM (4 Tablespoon)

    The cookie/cake things turned out kind of large, so next time, I’ll use a  smaller disher and get a smaller whoopie pie.

    In the end, Daddy LOVED the whoopie pies! He had one every day I was there. Even my mom liked them, and she doesn’t like a lot of sweets. My next whoopie pie adventure…Red Velvet!

    Chocolate Whoopie Pies from Gourmet

    2010 397
    For cakes
    • 2 cups all-purpose flour
    • 1/2 cup Dutch-process cocoa powder
    • 1 1/4 teaspoon baking soda
    • 1 teaspoon salt
    • 1 cup well-shaken buttermilk
    • 1 teaspoon vanilla
    • 1 stick (1/2 cup) unsalted butter, softened
    • 1 cup packed brown sugar
    • 1 large egg
    For filling
    • 1 stick (1/2 cup) unsalted butter, softened
    • 1 1/4 cups confectioners sugar
    • 1 cup marshmallow cream such as Marshmallow Fluff
    • 1 teaspoon vanilla
    Make cakes:
    • Preheat oven to 350ºF.

    • Whisk together flour, cocoa, baking soda, and salt in a bowl until combined. Stir together buttermilk and vanilla in a small bowl.

    • Beat together butter and brown sugar in a large bowl with an electric mixer at medium-high speed until pale and fluffy, about 3 minutes in a standing mixer or 5 minutes with a handheld, then add egg, beating until combined well. Reduce speed to low and alternately mix in flour mixture and buttermilk in batches, beginning and ending with flour, scraping down side of bowl occasionally, and mixing until smooth.

    • Spoon 1/4-cup mounds of batter about 2 inches apart onto 2 large baking sheets covered in parchment paper. Bake in upper and lower thirds of oven, switching position of sheets halfway through baking, until tops are puffed and cakes spring back when touched, 11 to 13 minutes. Transfer with a metal spatula to a rack to cool completely.

    Make filling:
    • Beat together butter, confectioners sugar, marshmallow, and vanilla in a bowl with electric mixer at medium speed until smooth, about 3 minutes.

    Assemble pies:
    • Spread a rounded tablespoon filling on flat sides of half of cakes and top with remaining cakes.

    Cook's Notes:

    • Cakes can be made 3 days ahead and kept, layered between sheets of wax paper, in an airtight container at room temperature.
    • Filling can be made 4 hours ahead and kept, covered, at room temperature.
    Continue reading...

    Saturday, November 20, 2010

    Cheers and Beers! Lane’s 30th


    It’s official. My husband is in his thirties! Does this make me a trophy wife?? Lane insisted that nothing BIG was planned for his birthday. He just wanted a nice dinner at home and then to go to Waco and tailgate for the Baylor vs A&M football game. I begrudgingly obliged. I did want to do a bunch of little things because, let’s be honest, this is a big birthday! If he didn’t want to go big, then I would do lots of little things that could add up to be big… On Thursday, I had my 7th period kids call him and, all together, say “Happy last day of your 20’s!”. That evening, we ordered Italian food from our favorite local joint, ate dinner by the fire and had lots of wine. It was a nice birthday eve.

    On Friday, his birthday, I took the day off and spent it in the kitchen where I’m most happy, especially cooking for him. It started with breakfast, where his request was biscuits and gravy with an over-easy egg on top! Ok?! I can do that. I haven’t mastered eggs yet. They say that while eggs seem like the most simple thing to cook, they are actually one of the hardest. I believe it. I was really nervous to try to flip the egg in my pan, but it worked! Lane and I were both shocked! So, the day started off with a good breakfast…

    2010 361

    He left after breakfast to run errands and do a little work, so I put fun sticky notes all over the house. They started at the front door with “30 reasons I’m glad you were born”. It then led him on a little scavenger hunt around the house. It was fun, and “not too big”.

    That evening, we planned dinner at home. On the menu, we had:

    -Bungalow Salad

    -Baked Potatoes

    -Filet Mignon

    -Sour Cream Apple Pie

    (All recipes previously posted) except the baked potato recipe.

    I have a confession. This is shameful. Very shameful. Are you ready??


    I’ve never baked a potato before!!! SHHH…


    I just don’t prefer baked potatoes. I will eat them, but prefer mashed instead. Lane, is the opposite. So when he asked for baked potatoes I had to call my mom and ask (which I immediately forgot what she said) and then had to rely on the internet. Thankfully, the internet let me to Alton Brown, which led me to the perfect baked potato.

    2010 374

    Baked Potatoes courtesy of Alton Brown

    1 large russet potato (If it looks like Mr. Potato Head(r), you've got the right one.)

    Canola oil to coat

    Kosher salt

    Heat oven to 350 degrees and position racks in top and bottom thirds. Wash potato (or potatoes) thoroughly with a stiff brush and cold running water. Dry, then using a standard fork poke 8 to 12 deep holes all over the spud so that moisture can escape during cooking. Place in a bowl and coat lightly with oil. Sprinkle with kosher salt and place potato directly on rack in middle of oven. Place a baking sheet on the lower rack to catch any drippings.

    Bake 1 hour or until skin feels crisp but flesh beneath feels soft. Serve by creating a dotted line from end to end with your fork, then crack the spud open by squeezing the ends towards one another. It will pop right open. But watch out, there will be some steam.

    NOTE: If you're cooking more than 4 potatoes, you'll need to extend the cooking time by up to 15 minutes.

    Served with cheese, sour cream, bacon bits and green onions.

    With dinner,  we opened up a bottle of wine that I bought in Napa Valley, days after Lane and I got engaged. I bought it at Merryvale, which is where we planned to have our rehearsal dinner. Sadly, our plans to marry in Napa Valley were changed due to a significant amount of family that wouldn’t be able to make it.  However, I still have such great memories of Merryvale and can’t wait to take Lane there one day! He’s had their wine several times before and requested this bottle for his birthday. I agreed, only on the notion that we’d have to go back soon and get more!
    2010 372

    For your viewing pleasure, here’s a peek at the Merryvale Cask Room…Someday, we hope to have an anniversary party there to make up for our planned rehearsal dinner that we had to cancel.

    DSC_0364

    We went to bed that evening, fat and happy!

    2010 375

    The next day, we packed up the car and headed to Waco for the A&M/Baylor football game. Lane and I have been to every A&M/Baylor game together, except for one, since we met six years ago. So this was a fun way to end his birthday weekend.

    2010 376

    We have good friends that own a school bus that’s been converted to an RV and painted green and gold! They take it to most home games in Waco and we planned to tailgate with them. I made a few snacks for the day since we wouldn’t really be able to eat a real meal. It was really fun to see a bunch of RANDOM people crowded around our table scarfing down my food. It was flattering! I made Pumpkin Cream Cheese dip, Caramelized Onion Dip, Banana Nut Bread and S’Mores Cupcakes (recipes below).

    We had such a fun weekend and Lane said it was a great birthday. We were so happy to share it with friends. My friends, Banner and Jill came down to celebrate, as well as Lane’s best friend (and Baylor Bear!) Raymond and his girlfriend, Ashleigh. We were blessed to share the day with them.

    2010 377

    Jill, Banner and Me, holding our “Beers and Cheers, Lane’s 30” cups I had made!

    raymond and ashleigh

    Raymond and Ashleigh

    What a great birthday weekend! Happy Birthday to my best friend, husband and partner! I love you!

    Recipes

    Pumpkin Cream Cheese Dip from Creating Nirvana

    (sorry, no picture. Just imagine an orange dip!)

    2 cups of roasted pumpkin puree or canned pumpkin puree
    1 8 ounce package of cream cheese, room temperature
    1 tsp cinnamon
    ¼ tsp ground ginger
    ¼ tsp ground cloves
    ¼ cup brown sugar

    Blend all the ingredients together. Chill in the refrigerator for 1 hour before serving. Serve with crackers or fruit.

    (I served it with pretzels and really liked it!) This was so easy. I’ll definitely make it again.

    Caramelized Onion Dip from Rachel Ray, via Peace, Love and French Fries

    2010 362

    1 tbsp olive oil
    1 tbsp butter
    2 large onions, chopped
    2 cloves garlic, minced
    1 tsp thyme
    1 beef bouillon cube
    1/2 cup water
    2 tsp Worcestershire sauce
    16 oz sour cream (I used reduced fat)
    3 oz cream cheese, softened (I used reduced fat)


    Heat butter and oil in a medium saucepan over medium heat (I went between medium and medium-low). Cook onions and garlic until soft and brown, between 20-20 minutes, stirring every 3-4 minutes.
    Add beef bouillon and water, cook until mixture is combined. Season with Worcestershire sauce, thyme, salt and pepper to taste. Stir until combined. Cool and refrigerate mixture.
    Combine sour cream and cream cheese, stir until smooth. Add chilled onion mixture and stir to combine. Chill for at least 30 minutes before serving.

    THIS IS DELICIOUS! I served it with the Cracked Pepper Triscuits, and they were perfect with it. It was GONE by the end of the tailgate.

    Banana Nut Bread from Thyme and Traditions Cookbook (Glenwood Church of Christ in Tyler, Texas)

    2010 367

    1/2 c. Sugar

    2 Eggs

    2 c. Flour

    1 tsp. baking soda

    3/4 c. buttermilk

    3 medium bananas, mashed

    1 c. nuts (I used pecans)

    1 tsp. vanilla

    Cream sugar and eggs until fluffy. Sift together flour and baking soda, then add to butter and sugar. Ad buttermilk, bananas, nuts and vanilla. Bake 50 minutes at 350 until done.

    I can’t tell you how this tasted, because, well, I never got any! I set it on the table and never saw it again! Who knows. So, if you had any or make it, let me know! I’m sure I’ll make it again soon, though, because I always have leftover bananas from my lunch. (I only like green bananas! I don’t like when they brown!)

    S’Mores Cupcakes

    (I don’t know where I found this recipe, so I can’t site a source! I’m so sorry. If it’s yours, let me know. I’ll be happy to credit you.)

    2010 381

    Graham Cracker & Milk Chocolate Cupcakes
    1 cup all-purpose flour
    1 cup finely crushed graham crackers

    2 teaspoons baking powder
    1 teaspoon salt (I reduced this to 1/2 tsp)
    1/2 cup (1 stick) unsalted butter, room temperature
    3/4 cup sugar
    2 eggs
    1 teaspoon vanilla extract
    3/4 cup milk (room temp)
    4 hershey's milk chocolate bars (I pulsed mine in the food processor to make them a lot smaller)


    Swiss Meringue Marshmallow Frosting (NOT BUTTERCREAM)
    1 1/4 cups granulated sugar
    4 egg whites
    1-2 teaspoons vanilla extract (optional)
    1. Preheat oven to 350°F.
    2. Mix flour, crushed graham crackers, baking powder, and salt together and set aside.
    3. Cream butter and sugar until light and fluffy. Add eggs, one at a time, mixing well after each addition. Add vanilla. Alternately add flour mixture and milk and beat until batter is almost smooth. Fold in chocolate chips.
    4. Spoon batter into cupcake papers, filling cups about 2/3 full. Bake for 20-25 minutes or until a tester inserted into the center comes out clean. Remove from oven and cool.
    5. To make the frosting: Combine egg whites and sugar in the top of a double boiler (or a glass bowl over but not touching a pan of simmering water). Whisk constantly over medium-high heat until mixtures reaches 160°F, about 5 minutes. Pour egg white mixture into the bowl of a stand mixer fitted with the whisk attachment. Beat on high for 6 minutes or until room temperature. Add optional vanilla extract 1 teaspoon at a time until desired flavor.
    6. Frost cooled cupcakes and sprinkle with grated milk chocolate or graham cracker crumbs.

    I actually ran out of eggs, and didn’t make the meringue frosting. I ended up making just a basic cream cheese/buttercream icing. I also molded hershey’s into the lego shape with a lego ice tray! Lane LOVED Legos as a child, so I thought it was a fun touch.

    Continue reading...