Showing posts with label Desserts. Show all posts

Monday, July 11, 2011

the sounds of a hungry cow.

Posted by LeighAnne at 12:30 AM 0 comments
Christmas2009 012

I spent last week at my parent’s house in East Texas. They were desperate for a vacation. They’ve been working SOOO hard and the only way they were going to be able to go was if I could come down and watch their house and dog, and help out with the office. So, considering that I’m forever in debt to my parents, I drove down to Tyler on Monday morning and stayed until Saturday morning. I spent the week by myself in the country… Well, not totally by myself. I had Jax. And the cow.

The first  night was a little rough. I didn’t sleep because it’s always scary to be somewhere “new” by yourself. Oh, and Jax licked and scratched all night. ugh. Even if I had slept, however, there would be no need for me to set an alarm. Every morning at 7 a.m., I woke up to the sounds of a VERY hungry mama cow. (The people who live behind my parents have a high school aged son who is part of FFA and is raising a cow. She and Knox used to play along the fence line and she would moo at him. Recently, she had a baby cow and apparently has gotten quite sassy…) At 7 a.m. EVERY DAY, I would wake up to her mooooooing for food. She would even go over to her food trough and turn it over to make a statement! I’m not talking about a wimpy mooo. We’re talking loud, sassy, HUNGRY moo. (I can’t say I don’t know what she’s talking about…We’ve all been there.) There’s probably an acre between my parent’s bedroom and her pasture and she woke me up. So, needless to say, it was quite the unusual experience for me! It was nice to have a little different pace than what I’m used to. 

I enjoyed being in my parents house because it’s just so different than mine. It was nice to be in a big kitchen and be able to move around while I cook. One night I made myself a steak  (close your ears, mama cow!) using this recipe, and it turned out perfect! I was so proud of myself! I didn’t need Lane to cook my steak! (Although, I do like sharing them with someone else. Steaks alone are kinda sad…)

While I was there, I went and shopped around their fabulous new grocery store. (sad that I’m at a point in my life when I blog about how wonderful grocery stores are..) I roamed the aisles for quite a while. I was in heaven! I picked up some amazing looking organic strawberries and knew I had to make strawberry ice cream (open your ears now, mama cow!)

Look at these GORGEOUS strawberries!

DSCN1972

I have made this recipe several times before but haven’t ever blogged about it. It’s SOOOOOO good and SOOOOOO easy. The first time I made it, I told my oldest nephew I was making strawberry ice cream and he turned his nose up. Then, we convinced him to try it and now I’m pretty sure he’s obsessed like the rest of us!

Of course I got the recipe from Annie’s Eats. Where else would I go to get recipes?? She just posted about making ice cream and the  two different techniques used. It’s a great post if you’re interested in ice cream making!

 Strawberry Ice Cream from Annie’s Eats

DSCN1979

Ingredients:

2 cups fresh ripe strawberries, stemmed and sliced

3 tbsp. freshly squeezed lemon juice (If you use too much, it can take on a lemony taste. I just used the juice of half of one medium sized lemon and it was perfect.)

1 cup sugar, divided

1 cup whole milk

2 cups heavy cream

1 tsp. vanilla extract

Directions:

Combine the strawberries with the lemon juice and 1/3 cup of sugar; stir gently and allow the strawberries to macerate in the juices for 2 hours.

In another bowl, use a hand mixer to combine the milk and granulated sugar until the sugar is dissolved. Stir in the heavy cream, the vanilla and any accumulated juices from the strawberries.

Turn on your ice cream maker and pour the mixture into the frozen bowl. Let mix until thickened, about 25-30 minutes. Add the sliced strawberries during the last 5 minutes of freezing. Ice cream will be soft at this point. For a firmer ice cream, transfer to an airtight container and store in freezer until it has reached your desired consistency.

________________

And, finally, I’d be remiss if I didn’t share with you one more cow story…

When my parents arrived home on Friday night, my dad and I were on the back patio having a few drinks and talking. I decided to walk do to the fence line and see if the baby cow would let me pet it. Before mama cow had the baby, she was very affectionate. She loved to be rubbed on and would come to the fence when you were there. So, I walked down to the fence slowly and made my presence known. Both cows were chewing on grass and the baby was the closest to the fence. As I got closer, the baby got a little scared and moved away. Mama, however, moved closer to me. I thought the was headed my way to let me pet her…

She stared at me the whole way to the fence and as she got about 10 feet from me, SHE CHARGED!!!!!!!! She didn’t come through the fence, nor do I think it was her intention to, but she was sending me a message! I am pretty sure I spilled most of the drink in my hand and I RAN back up to the house. My dad was doubled over laughing. He said he hadn’t seen me move that fast since junior high track meets! She scared the living daylights out of me and I’m pretty sure I don’t feel bad anymore about eating my delicious steak. Hmmmmph.

Glaring at me through the fence…

mama cow

And, of course, Jax pictures. Jax and I had LOTS of conversations over the course of 6 days. Most were about how I could further meet the needs of the King. That included how he will only, from now on, eat his food after it’s been drizzled in hot water on a paper plate and microwaved for 15 seconds. If you’ve ever smelled microwaved dog food, vomit is probably the word that comes to mind.

His morning pose. He lays like this until you rub his belly for a LONG time.

jax belly

In the car on the way to the vet for his allergy shots..

sleepy jax

I went to the restroom and came back to find him on the kitchen table. He LOVES to sunbathe and was not happy that I had interrupted him. (This picture isn’t from last week, but I caught him in this same position.)

jaxontable2

Cheers!

Sunday, January 23, 2011

Honey.Lavender.Vanilla.Bean.Ice.Cream.

Posted by LeighAnne at 7:43 PM 0 comments

Yes, yes, that’s what I said. Honey Lavender Vanilla Bean Ice Cream. We first tried it at our favorite restaurant, Hibiscus, but I was always intimidated to use lavender to cook with. Well, this Christmas, I made lavender sachets and lavender bath scrubs for my mom and Lane’s mom and had some of the lovely flower left over. I had no excuse to not try the ice cream!  It was made easy by my mom’s ice cream maker.

I will definitely have one of these babies on my wish list as summer rolls around. Speaking of summer….Can it come soon, please?

Anyway, I’ve only made one ice cream before and it was really easy. This one seemed a little bit more laborious, but still relatively easy.

As far as taste goes, it was definitely lavender-y. I think next time, I would use less lavender and more honey. It was a little bitter because of the lavender. Maybe I let it steep for too long. Not sure. We served it, however, with the Sour Cream Apple Pie which is plenty sweet and it worked really well with that. It’s not an ice cream that you would sit in front of the TV and have a bowl of, but served with the right thing, it works well.

The mixture in the saucepan ready to steep.

2011 031

Honey Lavender Vanilla Bean Ice Cream adapted from Martha Stewart

  • 2 cups whole milk
  • 1/4 cup dried lavender (I purchased in the Bulk section of my Central Market)
  • 1 whole vanilla bean, split and scraped
  • 1/3 cup honey
  • 5 large egg yolks
  • 1/4 cup sugar
  • 1 cup heavy cream
    1. In a medium saucepan, combine milk, lavender, vanilla bean and honey. Bring to a gentle boil, cover, and remove from heat. Let steep for 5 minutes. Strain mixture, reserving milk and discarding lavender.
    2. Combine egg yolks and sugar in the bowl of an electric mixer. Beat on medium-high speed until very thick and pale yellow, 3 to 5 minutes. Meanwhile, return milk to a medium saucepan, and bring to a simmer over medium-low heat.
    3. Add half the milk to egg-yolk mixture, and whisk until blended. Stir mixture into remaining milk, and cook over low heat, stirring constantly, until mixture is thick enough to coat the back of a wooden spoon.
    4. Remove from heat, and immediately stir in cream. Strain mixture into a medium mixing bowl set in an ice-water bath, and let stand until chilled, stirring from time to time. Freeze in an ice-cream maker according to manufacturer's instructions. Store in an airtight plastic container up to 2 weeks.

  • Sunday, December 12, 2010

    Cookie Monster

    Posted by LeighAnne at 7:33 PM 0 comments

    2010 399

    One of my and Lane’s favorite things is a cookie cake from Great American Cookie Company. They are just pure deliciousness. We normally get them for each other’s birthday and that’s our fix for the entire year. Well, the other day, Lane asked if I could make one. I thought, “Sure. I’ll make it and you can take it to work, because there’s no way we can eat a cookie cake by ourselves.”

    Famous. Last. Words Thoughts. Not only did I make it, but we ate the entire thing! YIKES! It stayed fresh for over a week and we would nibble on it after dinner or for breakfast (don’t judge. cookie cake for breakfast is the best.)

    I just searched for Cookie Cake recipes and this one seemed easy and quick, so it was the winner. Simple and delicious. I didn’t ice it, but you certainly could and I can only imagine how the delicious factor would rise.

    Giant Chocolate Chip Cookie from Allrecipes.com

    1 c. butter, softened

    3/4 c. granulated sugar

    3/4 c. brown sugar, packed

    1 T. vanilla extract

    2 eggs

    2 1/4 c. AP flour

    1 t. salt

    1 t. baking soda

    2 c. semisweet chocolate chips

    1 c. chopped walnuts (I omitted)

    In a large bowl, beat butter, sugars and vanilla until light and fluffy. Add eggs, one at a time, beating well. Gradually add flour, salt and baking soda, beating until well blended. Stir in chocolate chips and nuts (if desired). Spread in a greased 14” round pizza pan. Bake at 375 degrees for 20-25 minutes. Cook cookie in pan on a cooling rack. Decorate as desired.

    And, completely unrelated, but for your viewing pleasure, HEEEEEERE’S KNOX! He’s ready for Santa!

    2010 402 2010 404 2010 406

    Sunday, November 28, 2010

    Whoopie Pies for Daddy!

    Posted by LeighAnne at 7:41 PM 0 comments

    My dad likes those Moon Pie things…you know, the really highly processed, not very tasty (in my humble opinion), plastic wrapped desserts?

    I think they are pretty gross, but he LOVES them! He’s loved them since he was a kid. Over Thanksgiving, I planned to spend a few nights with them and wanted to make him a dessert that he REALLY would like, and that weren’t Moon Pies.
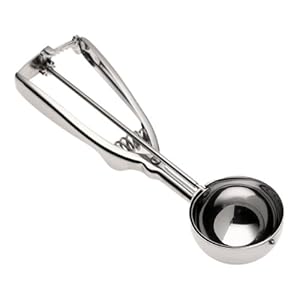
    I’ve seen all the latest craze concerning whoopie pies, so of course I had to try them. These turned out perfectly! The “cookie” part is very cake-like and moist. The filling is light and fluffy and a perfect compliment to the cake. When I dished the cookies onto the cookie sheet, I used a large “disher” (one of these things….)Norpro Stainless Steel Scoop, 56MM (4 Tablespoon)

    The cookie/cake things turned out kind of large, so next time, I’ll use a  smaller disher and get a smaller whoopie pie.

    In the end, Daddy LOVED the whoopie pies! He had one every day I was there. Even my mom liked them, and she doesn’t like a lot of sweets. My next whoopie pie adventure…Red Velvet!

    Chocolate Whoopie Pies from Gourmet

    2010 397
    For cakes
    • 2 cups all-purpose flour
    • 1/2 cup Dutch-process cocoa powder
    • 1 1/4 teaspoon baking soda
    • 1 teaspoon salt
    • 1 cup well-shaken buttermilk
    • 1 teaspoon vanilla
    • 1 stick (1/2 cup) unsalted butter, softened
    • 1 cup packed brown sugar
    • 1 large egg
    For filling
    • 1 stick (1/2 cup) unsalted butter, softened
    • 1 1/4 cups confectioners sugar
    • 1 cup marshmallow cream such as Marshmallow Fluff
    • 1 teaspoon vanilla
    Make cakes:
    • Preheat oven to 350ºF.

    • Whisk together flour, cocoa, baking soda, and salt in a bowl until combined. Stir together buttermilk and vanilla in a small bowl.

    • Beat together butter and brown sugar in a large bowl with an electric mixer at medium-high speed until pale and fluffy, about 3 minutes in a standing mixer or 5 minutes with a handheld, then add egg, beating until combined well. Reduce speed to low and alternately mix in flour mixture and buttermilk in batches, beginning and ending with flour, scraping down side of bowl occasionally, and mixing until smooth.

    • Spoon 1/4-cup mounds of batter about 2 inches apart onto 2 large baking sheets covered in parchment paper. Bake in upper and lower thirds of oven, switching position of sheets halfway through baking, until tops are puffed and cakes spring back when touched, 11 to 13 minutes. Transfer with a metal spatula to a rack to cool completely.

    Make filling:
    • Beat together butter, confectioners sugar, marshmallow, and vanilla in a bowl with electric mixer at medium speed until smooth, about 3 minutes.

    Assemble pies:
    • Spread a rounded tablespoon filling on flat sides of half of cakes and top with remaining cakes.

    Cook's Notes:

    • Cakes can be made 3 days ahead and kept, layered between sheets of wax paper, in an airtight container at room temperature.
    • Filling can be made 4 hours ahead and kept, covered, at room temperature.

    Sunday, August 8, 2010

    German Chocolate Cake

    Posted by LeighAnne at 11:00 PM 0 comments

    recovery737

    I am surrounded by men who are obsessed with German chocolate cake. My husband, nephew and father are all smitten with it. But, I have a secret. I don’t like German chocolate cake. So, when my nephew and father both requested one for their birthday (they are a day apart), I knew I had to make one…and make it good. Because I don’t eat it, I have to assume that good means it has lots of ingredients and requires lots of time. According to the eaters of the cake today, my assumption was right.

    It took about 3 hours to make and I have a mean mess to clean in my kitchen, but it was worth it to see how happy my family were while eating it. It brings me joy to see how baked goods make people happy…I would love to have a bakery one day and experience that joy as my job.

    Anyway, I still haven’t mastered getting a four layer cake to be level. Yes, I have a cake leveler, but I haven’t mastered that either. This cake didn’t disappoint in the crooked category. I also was in a hurry to finish decorating it and my frosting tip came out of my plastic bag. Once that happened, there was no turning back. So, while it wasn’t the prettiest cake, it apparently was very delicious.

    I would suggest a few changes: I used German chocolate in the cake batter as opposed to the bittersweet/un-sweet that the recipe suggests. I just didn’t feel right making a German chocolate cake without GERMAN chocolate. I forgot to add the vanilla extract  in the batter and also didn’t have any dark rum for the syrup. So, I just used vanilla in the syrup instead. I’m sure the rum would add a great flavor, but I didn’t have any and didn’t want to go buy a bottle for 2 ozs. I also didn’t feel like the recipe made enough filling. It doesn’t need to be doubled, but just needs a little more. I barely had enough for the top layer and I know I didn’t over fill the rest of the layers. EDIT: So as I’m typing this, Lane gave me his honest opinion about the cake. While he said it was delicious, he also said that it wasn’t what he thinks of when he thinks of a GCC. He suggested that instead of icing the sides with the ganache, I should used the filling. He said it needed more of that flavor. So, maybe double the filling recipe and use it to ice the sides. You can still decorate the top with the ganache because it’s delicious!

    German Chocolate Cake adapted from David Lebovitz

    For the cake:
    2 ounces bittersweet or semisweet chocolate chopped (I used German Chocolate instead.)
    2 ounces unsweetened chocolate, chopped

    (I used German Chocolate instead.)
    6 tablespoons water
    8 ounces (2 sticks) unsalted butter, at room temperature
    1 ¼ cup + ¼ cup sugar
    4 large eggs, separated
    2 cups all-purpose flour
    1 teaspoon baking powder
    1 teaspoon baking soda
    ½ teaspoon salt
    1 cup buttermilk, at room temperature
    1 teaspoon vanilla extract

    For the filling:
    1 cup heavy cream
    1 cup sugar
    3 large egg yolks
    3 ounces butter (6 T), cut into small pieces
    ½ teaspoon salt
    1 cup pecans, toasted and finely chopped
    1 1/3 cups unsweetened coconut, toasted

    For the syrup:
    1 cup water
    ¾ cup sugar
    2 tablespoons dark rum

    For the chocolate icing:
    8 ounces bittersweet or semisweet chocolate, chopped (I used a bag of Ghirardelli

    2 tablespoons light corn syrup
    1 ½ (3 T)ounces unsalted butter
    1 cup heavy cream

    1. Butter two 9-inch cake pans, then line the bottoms with rounds of parchment or wax paper. Preheat the oven to 350°.

    2. Melt both chocolates together with the 6 tablespoons of water. Use either a double-boiler or a microwave. Stir until smooth, then set aside until room temperature.

    3. In the bowl of an electric mixer (I used my stand mixer), or by hand, beat the butter and 1 ¼ cup of the sugar until light and fluffy, about 5 minutes. Beat in the melted chocolate, then the egg yolks, one at a time.

    4. Sift together the flour, baking powder, baking soda, and salt.

    5. Mix in half of the dry ingredients into the creamed butter mixture, then the buttermilk and the vanilla extract, then the rest of the dry ingredients.

    6. In a separate metal or glass bowl, beat the egg whites until they hold soft, droopy peaks. Beat in the ¼ cup of sugar until stiff.

    7. Fold about one-third of the egg whites into the cake batter to lighten it, then fold in the remaining egg whites just until there's no trace of egg white visible.

    8. Divide the batter into the 2 prepared cake pans, smooth the tops, and bake for about 45 minutes, until a toothpick inserted into the center comes out clean.

    Cool cake layers completely.

    While the cakes are baking and cooling, make the filling, syrup, and icing.

    To make the filling:

    1. Mix the cream, sugar, and egg yolks in a medium saucepan. Put the 3 ounces butter, salt, toasted coconut, and pecan pieces in a large bowl.

    2. Heat the cream mixture and cook, stirring constantly (scraping the bottom as you stir) until the mixture begins to thicken and coats the spoon (an instant-read thermometer will read 170°.)

    3. Pour the hot custard immediately into the pecan-coconut mixture and stir until the butter is melted. Cool completely to room temperature. (It will thicken.)

    To make the syrup:

    1. In a small saucepan, heat the sugar and water until the sugar has melted. Remove from heat and stir in the dark rum.

    To make the icing:

    1. Place the 8 ounces of chopped chocolate in a bowl with the corn syrup and 1 ½ ounces of butter.

    2. Heat the cream until it just begins to boil. Remove from heat and pour over the chocolate. Let stand one minute, then stir until smooth. Let sit until room temperature.

    To assemble the cake:

    Remove the cake layers from the pans and cut both cake layers in half horizontally, using a serrated bread knife.
    Set the first cake layer on a cake plate. Brush well with syrup. Spread ¾ cup of the coconut filling over the cake layer, making sure to reach to the edges. Set another cake layer on top.

    Repeat, using the syrup to brush each cake layer, then spreading ¾ cup of the coconut filling over each layer, including the top.

    Ice the sides with the chocolate icing, then pipe a decorative border of chocolate icing around the top, encircling the coconut topping.

    Side note: I can’t believe my nephew is 12! I know its cliché to say, but I remember when he was born. I remember his first steps. I remember picking him up from day care. I remember holding him in the hospital when he had RSV. He’s a wonderful boy (he’s not a teenager yet, darn it!) and I am so thankful that God has blessed my life with him.

    Wednesday, August 4, 2010

    Snickerdoodledoo! Wahooo!

    Posted by LeighAnne at 9:42 AM 0 comments

    summer 028

    Snickerdoodles are my FAVORITE cookies. They are just so good. They aren’t plain like a sugar cookie, but aren’t too complicated like a white chocolate macadamia nut cookie. They are perfect. I don’t normally make cookies, but wanted to send Lane to a party with something that was easy to travel with and we all know how I drive when there are cupcakes in the car…so, snickerdoodles were the answer! I searched for a while trying to find a recipe that didn’t use shortening. It’s just really, really bad for you and I really, really wanted to eat a lot of cookies! So, I came across this recipe from the amazing Annie’s Eats. I haven’t made anything of hers yet that isn’t amazing. (If you have an ice cream maker, you should also try her strawberry ice cream!!)

    These cookies are the perfect snickerdoodle (despite what the fuzzy picture shows..) They have a bit of a crunchy exterior and a super soft interior. They are fluffy and buttery and melt in your mouth!

    Snickerdoodles

    2 3/4 c. all-purpose flour
    2 tsp. baking powder
    1/2 tsp. coarse salt
    1 c. unsalted butter, softened
    1 3/4 c. sugar, divided
    2 large eggs
    4-5 tsp. ground cinnamon

    Preheat oven to 350 degrees F. Sift together flour, baking powder, and salt. Set aside.

    Put butter and 1 1/2 c. sugar in the bowl of a stand mixer fitted with the paddle attachment. Mix on medium speed until pale and fluffy, about three minutes. Mix in eggs.

    Reduce speed to low and gradually incorporate flour mixture.

    In a small bowl, stir together remaining 1/4 c. sugar and cinnamon to preferred ratio. Shape dough into 1 3/4 in. balls (you should have about 20). Roll in cinnamon sugar and place three inches apart on baking sheets lines with parchment paper.

    Bake cookies, rotating sheets halfway through, until edges are golden, twelve to 15 minutes. Let cool on wire racks.  ENJOY!!

    summer 029

    Sunday, June 20, 2010

    Homemade Hibiscus

    Posted by LeighAnne at 5:24 PM 0 comments

    hibiscus 002

    One night, before attending a play at Dallas’ new Winspear Opera House, we decided to try Hibiscus. We had heard how great it was from friends and for a wedding shower gift, we were given a $50 gift certificate, so we decided to give it a try.

    Let me just say, if I could make babies with Hibiscus…I would. It’s that good. It is one of the best meals we have ever eaten, and well, we eat a lot of meals. Everything we had was unbelievable. We had a lump crab appetizer, we each had salads (I had the bungalow, Lane had the wedge), for our entrees I had the short ribs and Lane had a filet. (He says it’s in the top four best steaks he’s ever had.) We shared their famous macaroni and cheese and had their sour cream apple pie with lavender ice cream for dessert. It’s making me salivate just thinking about it.

    The only problem with Hibiscus is that it’s really expensive. Let’s just say that our $50 gift certificate didn’t even cover the tip. It was really worth it, but now we have to save up to go. So, instead of dropping lots of moola on dinner there, I decided to re-create our dinner here at home. I went to Central Market and got everything I needed and literally spent the rest of the day in the kitchen. Side note: I am currently reading Laura Bush’s “Spoken from the Heart” book and she remembers her mother spending all day in the kitchen…from 5:30 a.m. to after dinner. I have so much more respect for my great grandmother, whose reality was very much similar to that of Mrs. Bush’s mother’s. Lane’s mom also spends a lot of her time cooking when we come visit and I am so thankful. That’s hard work!

    So, the menu for our homemade Hibiscus dinner was:

    Appetizer: Crab meat with Avocado, Fresh Horseradish and cocktail sauce

    Salad: Hibiscus Bungalow salad with Iceberg Lettuce, Tomatoes, Candied Pecans, Smoked Bacon, Avocado, Blue Cheese and Lite Honey Mustard

    Entree: Filet Mignon

    Side: Gourmet Mac and Cheese

    Dessert: Sour Cream Apple Pie with Vanilla Ice Cream

    Recipes:

    Crab Meat with Avocado, Fresh Horseradish and Cocktail Sauce

    hibiscus 003

    Holy crustacean! Do you know how expensive lump crab meat is! Central Market only offered it in 1 lb. containers. Your options were jumbo lump ($26/lb), lump ($16/lb) or claw meat at ($8/lb). I was blow away. I knew we didn’t need a whole pound of crab, and didn’t really want to pay that much for it, so I decided to come up with something else. Well, long story short, I had a craving for crab, so I went to the Whole Foods down the street where I got 1/2 lb of claw meat for $7. Darn it! I should have gotten it at CM. Oh well. In retrospect, I should have just sprung for the lump or jumbo lump. While it was still delicious, it would have been a little better with the better quality meat.

    1 avocado, split in half with the seed removed

    1/2 lb. crab meat (spring for jumbo lump if you can)

    Fresh horseradish, grated

    Juice of half of a lime

    Cocktail sauce, to taste

    Split the avocado in half and place each half on a serving plate. Fill top of avocado with 1/4 lb. crab meat. Top with fresh grated horseradish and a squeeze of lime. Serve with cocktail sauce. Serves 2. Enjoy!

    Bungalow Salad

    hibiscus 008

    1/2 head iceberg lettuce, torn

    1 large tomato, diced

    4 slices Applewood smoke bacon, cooked

    Pecans, toasted in butter and brown sugar

    Blue cheese, to taste

    Honey Mustard Dressing, to taste (the Hibiscus salad is served with a mustard vinaigrette, which I couldn’t find. I should have just made one considering the lite honey mustard dressing I used was very watery.)

    Assemble all ingredients and mix. Serves 2.

    Filet Mignon (From previous Blog Entry)

    Gourmet Mac and Cheese (adapted from Epicurious)

    hibiscus 009

    Hibiscus has amazing mac and cheese. It’s just really good. My friend Tamara is also and fan and when she asked for the recipe, they would only tell her the types of cheese needed. So she passed that information along to me and tried to figure it out. Well, while it was good, I forgot to add the cream cheese, so it was missing a creamy factor. Lane loved it and it had a very mild flavor. I think I’ll keep trying (or just get takeout mac and cheese from Hibiscus!)

    3/4 pound elbow macaroni

    For topping

    2 tablespoons unsalted butter

    2 cups coarse dry bread crumbs

    1 cup coarsely grated extra-sharp Cheddar (about 4 ounces)

    For cheese sauce

    3 tablespoons unsalted butter

    3 tablespoons all-purpose flour

    2 3/4 cups whole milk

    3/4 cups heavy cream

    4 cups coarsely grated cheese (about 1 pound)

    (I used about a 1/2 cup each of Port Salut, Parmesean and Mozzarella. For the rest, I used extra sharp cheddar. I should have also used about 4 oz. of cream cheese.)

    2 teaspoons Dijon mustard

    1 1/2 teaspoons salt

    1/4 teaspoon freshly ground black pepper

    Preheat oven to 400°F. and butter a 3-quart shallow baking dish (13x9 casserole). Fill a 6-quart kettle three fourths full with salted water and bring to a boil for macaroni.

    Make topping:
    Melt butter and in a bowl stir together with bread crumbs and Cheddar until combined well. Topping may be made 1 day ahead and chilled, covered.

    Make sauce:
    In a 5-quart heavy saucepan melt butter over moderately low heat and stir in flour. Cook roux, stirring, 3 minutes and whisk in milk. Bring sauce to a boil, whisking constantly, and simmer, whisking occasionally, 3 minutes. Stir in cream, cheeses, mustard, salt, and pepper. Remove pan from heat and cover surface of sauce with wax paper (put wax paper directly on the cheese sauce surface).

    Cook macaroni in boiling water until al dente. Reserve 1 cup cooking water and drain macaroni in colander. In a large bowl stir together macaroni, reserved cooking water, and sauce. Transfer mixture to baking dish.

    Sprinkle topping evenly over macaroni and bake in middle of oven 20 to 25 minutes, or until golden and bubbling.

    Sour Cream Apple Pie from Simple Recipes

    hibiscus 012

    This is pretty tasty. The crust wasn’t my favorite…it kind of tastes like pop tart crust, but you don’t taste too much of it because the flavor of the pie is pretty strong.

    1 cup sour cream
    2/3 cup sugar
    2 Tablespoons flour
    1/4 teaspoon salt
    1 teaspoon vanilla
    1 egg
    3 cups peeled, sliced tart apples (about 1 1/4 pounds of slices)
    1 9" unbaked pie shell, frozen or chilled in the freezer for at least 30 minutes (see pâte brisée recipe)

    Topping
    1/2 cup brown sugar, packed
    1/3 cup flour
    1/4 cup butter, room temperature
    1/2 teaspoon cinnamon
    Mix together all ingredients until the mixture resembles coarse crumbs. Chill until needed in the recipe.

    Preheat oven to 400°F.

    Beat together sour cream, sugar, flour, salt, vanilla and egg (can beat by hand). Add apples, mixing carefully to coat well.

    Put filling into a pie shell and bake at 400 degrees initially for 25 min.

    Remove from oven and sprinkle with Cinnamon Crumb Topping. Bake for and additional 20 more minutes.

    Let cool for a hour before serving. Serves 8.

    Lane was a happy man, post dinner!

    hibiscus 005

    Sunday, February 21, 2010

    Chocolate Chip Cookie Dough Truffles

    Posted by LeighAnne at 7:22 PM 0 comments

    I know that picture doesn't look like much, but trust me, these little truffles are like eating bits of heaven... and I don't even like cookie dough. It's the perfect mixture of sweet and bittersweet. They are just perfect. But, beware, you can't just eat one!

    Chocolate Chip Cookie Dough Truffles
    1 stick unsalted butter, room temperature
    1 cup light brown sugar, packed
    1 ½ tsp vanilla extract
    1/8 tsp salt
    2 cups flour
    14 oz can sweetened condensed milk
    1 cup semi-sweet mini chocolate chips
    ½ cup chopped walnuts (optional, I left out)
    2 cups 60% bittersweet chocolate chips
    2 tsp shortening

     Using a stand mixer, beat the butter and brown sugar together until fluffy; about 2 minutes. Add the vanilla, salt and flour; mix well. With the mixer on low, add the condensed milk until the batter is thoroughly combined. Fold in the chocolate chips and walnuts, if using.

    Refrigerate this mixture for at least 15 minutes before working with it.

     Using a tablespoon (or your hands), shape into evenly sized balls and place on a wax paper lined baking sheet. If the dough is sticky, coat your hands with either flour or cooking spray. I found that they get really sticky, so I wore latex gloves that I kept spraying with baking spray. Loosely cover with plastic wrap and refrigerate the balls for 3 hours, or up to overnight.

    To make the chocolate coating, combine the bittersweet chocolate and shortening in a microwavable bowl. Microwave on high in 30 second intervals until the mixture is melted and smooth. Using a toothpick, dip the dough balls in the chocolate to coat. Refrigerate until firm; about 30 minutes.

    Get ready to enjoy heaven!


    Showing posts with label Desserts. Show all posts
    Showing posts with label Desserts. Show all posts

    Monday, July 11, 2011

    the sounds of a hungry cow.


    Christmas2009 012

    I spent last week at my parent’s house in East Texas. They were desperate for a vacation. They’ve been working SOOO hard and the only way they were going to be able to go was if I could come down and watch their house and dog, and help out with the office. So, considering that I’m forever in debt to my parents, I drove down to Tyler on Monday morning and stayed until Saturday morning. I spent the week by myself in the country… Well, not totally by myself. I had Jax. And the cow.

    The first  night was a little rough. I didn’t sleep because it’s always scary to be somewhere “new” by yourself. Oh, and Jax licked and scratched all night. ugh. Even if I had slept, however, there would be no need for me to set an alarm. Every morning at 7 a.m., I woke up to the sounds of a VERY hungry mama cow. (The people who live behind my parents have a high school aged son who is part of FFA and is raising a cow. She and Knox used to play along the fence line and she would moo at him. Recently, she had a baby cow and apparently has gotten quite sassy…) At 7 a.m. EVERY DAY, I would wake up to her mooooooing for food. She would even go over to her food trough and turn it over to make a statement! I’m not talking about a wimpy mooo. We’re talking loud, sassy, HUNGRY moo. (I can’t say I don’t know what she’s talking about…We’ve all been there.) There’s probably an acre between my parent’s bedroom and her pasture and she woke me up. So, needless to say, it was quite the unusual experience for me! It was nice to have a little different pace than what I’m used to. 

    I enjoyed being in my parents house because it’s just so different than mine. It was nice to be in a big kitchen and be able to move around while I cook. One night I made myself a steak  (close your ears, mama cow!) using this recipe, and it turned out perfect! I was so proud of myself! I didn’t need Lane to cook my steak! (Although, I do like sharing them with someone else. Steaks alone are kinda sad…)

    While I was there, I went and shopped around their fabulous new grocery store. (sad that I’m at a point in my life when I blog about how wonderful grocery stores are..) I roamed the aisles for quite a while. I was in heaven! I picked up some amazing looking organic strawberries and knew I had to make strawberry ice cream (open your ears now, mama cow!)

    Look at these GORGEOUS strawberries!

    DSCN1972

    I have made this recipe several times before but haven’t ever blogged about it. It’s SOOOOOO good and SOOOOOO easy. The first time I made it, I told my oldest nephew I was making strawberry ice cream and he turned his nose up. Then, we convinced him to try it and now I’m pretty sure he’s obsessed like the rest of us!

    Of course I got the recipe from Annie’s Eats. Where else would I go to get recipes?? She just posted about making ice cream and the  two different techniques used. It’s a great post if you’re interested in ice cream making!

     Strawberry Ice Cream from Annie’s Eats

    DSCN1979

    Ingredients:

    2 cups fresh ripe strawberries, stemmed and sliced

    3 tbsp. freshly squeezed lemon juice (If you use too much, it can take on a lemony taste. I just used the juice of half of one medium sized lemon and it was perfect.)

    1 cup sugar, divided

    1 cup whole milk

    2 cups heavy cream

    1 tsp. vanilla extract

    Directions:

    Combine the strawberries with the lemon juice and 1/3 cup of sugar; stir gently and allow the strawberries to macerate in the juices for 2 hours.

    In another bowl, use a hand mixer to combine the milk and granulated sugar until the sugar is dissolved. Stir in the heavy cream, the vanilla and any accumulated juices from the strawberries.

    Turn on your ice cream maker and pour the mixture into the frozen bowl. Let mix until thickened, about 25-30 minutes. Add the sliced strawberries during the last 5 minutes of freezing. Ice cream will be soft at this point. For a firmer ice cream, transfer to an airtight container and store in freezer until it has reached your desired consistency.

    ________________

    And, finally, I’d be remiss if I didn’t share with you one more cow story…

    When my parents arrived home on Friday night, my dad and I were on the back patio having a few drinks and talking. I decided to walk do to the fence line and see if the baby cow would let me pet it. Before mama cow had the baby, she was very affectionate. She loved to be rubbed on and would come to the fence when you were there. So, I walked down to the fence slowly and made my presence known. Both cows were chewing on grass and the baby was the closest to the fence. As I got closer, the baby got a little scared and moved away. Mama, however, moved closer to me. I thought the was headed my way to let me pet her…

    She stared at me the whole way to the fence and as she got about 10 feet from me, SHE CHARGED!!!!!!!! She didn’t come through the fence, nor do I think it was her intention to, but she was sending me a message! I am pretty sure I spilled most of the drink in my hand and I RAN back up to the house. My dad was doubled over laughing. He said he hadn’t seen me move that fast since junior high track meets! She scared the living daylights out of me and I’m pretty sure I don’t feel bad anymore about eating my delicious steak. Hmmmmph.

    Glaring at me through the fence…

    mama cow

    And, of course, Jax pictures. Jax and I had LOTS of conversations over the course of 6 days. Most were about how I could further meet the needs of the King. That included how he will only, from now on, eat his food after it’s been drizzled in hot water on a paper plate and microwaved for 15 seconds. If you’ve ever smelled microwaved dog food, vomit is probably the word that comes to mind.

    His morning pose. He lays like this until you rub his belly for a LONG time.

    jax belly

    In the car on the way to the vet for his allergy shots..

    sleepy jax

    I went to the restroom and came back to find him on the kitchen table. He LOVES to sunbathe and was not happy that I had interrupted him. (This picture isn’t from last week, but I caught him in this same position.)

    jaxontable2

    Cheers!

    Continue reading...

    Sunday, January 23, 2011

    Honey.Lavender.Vanilla.Bean.Ice.Cream.


    Yes, yes, that’s what I said. Honey Lavender Vanilla Bean Ice Cream. We first tried it at our favorite restaurant, Hibiscus, but I was always intimidated to use lavender to cook with. Well, this Christmas, I made lavender sachets and lavender bath scrubs for my mom and Lane’s mom and had some of the lovely flower left over. I had no excuse to not try the ice cream!  It was made easy by my mom’s ice cream maker.

    I will definitely have one of these babies on my wish list as summer rolls around. Speaking of summer….Can it come soon, please?

    Anyway, I’ve only made one ice cream before and it was really easy. This one seemed a little bit more laborious, but still relatively easy.

    As far as taste goes, it was definitely lavender-y. I think next time, I would use less lavender and more honey. It was a little bitter because of the lavender. Maybe I let it steep for too long. Not sure. We served it, however, with the Sour Cream Apple Pie which is plenty sweet and it worked really well with that. It’s not an ice cream that you would sit in front of the TV and have a bowl of, but served with the right thing, it works well.

    The mixture in the saucepan ready to steep.

    2011 031

    Honey Lavender Vanilla Bean Ice Cream adapted from Martha Stewart

  • 2 cups whole milk
  • 1/4 cup dried lavender (I purchased in the Bulk section of my Central Market)
  • 1 whole vanilla bean, split and scraped
  • 1/3 cup honey
  • 5 large egg yolks
  • 1/4 cup sugar
  • 1 cup heavy cream
    1. In a medium saucepan, combine milk, lavender, vanilla bean and honey. Bring to a gentle boil, cover, and remove from heat. Let steep for 5 minutes. Strain mixture, reserving milk and discarding lavender.
    2. Combine egg yolks and sugar in the bowl of an electric mixer. Beat on medium-high speed until very thick and pale yellow, 3 to 5 minutes. Meanwhile, return milk to a medium saucepan, and bring to a simmer over medium-low heat.
    3. Add half the milk to egg-yolk mixture, and whisk until blended. Stir mixture into remaining milk, and cook over low heat, stirring constantly, until mixture is thick enough to coat the back of a wooden spoon.
    4. Remove from heat, and immediately stir in cream. Strain mixture into a medium mixing bowl set in an ice-water bath, and let stand until chilled, stirring from time to time. Freeze in an ice-cream maker according to manufacturer's instructions. Store in an airtight plastic container up to 2 weeks.

  • Continue reading...

    Sunday, December 12, 2010

    Cookie Monster


    2010 399

    One of my and Lane’s favorite things is a cookie cake from Great American Cookie Company. They are just pure deliciousness. We normally get them for each other’s birthday and that’s our fix for the entire year. Well, the other day, Lane asked if I could make one. I thought, “Sure. I’ll make it and you can take it to work, because there’s no way we can eat a cookie cake by ourselves.”

    Famous. Last. Words Thoughts. Not only did I make it, but we ate the entire thing! YIKES! It stayed fresh for over a week and we would nibble on it after dinner or for breakfast (don’t judge. cookie cake for breakfast is the best.)

    I just searched for Cookie Cake recipes and this one seemed easy and quick, so it was the winner. Simple and delicious. I didn’t ice it, but you certainly could and I can only imagine how the delicious factor would rise.

    Giant Chocolate Chip Cookie from Allrecipes.com

    1 c. butter, softened

    3/4 c. granulated sugar

    3/4 c. brown sugar, packed

    1 T. vanilla extract

    2 eggs

    2 1/4 c. AP flour

    1 t. salt

    1 t. baking soda

    2 c. semisweet chocolate chips

    1 c. chopped walnuts (I omitted)

    In a large bowl, beat butter, sugars and vanilla until light and fluffy. Add eggs, one at a time, beating well. Gradually add flour, salt and baking soda, beating until well blended. Stir in chocolate chips and nuts (if desired). Spread in a greased 14” round pizza pan. Bake at 375 degrees for 20-25 minutes. Cook cookie in pan on a cooling rack. Decorate as desired.

    And, completely unrelated, but for your viewing pleasure, HEEEEEERE’S KNOX! He’s ready for Santa!

    2010 402 2010 404 2010 406

    Continue reading...

    Sunday, November 28, 2010

    Whoopie Pies for Daddy!


    My dad likes those Moon Pie things…you know, the really highly processed, not very tasty (in my humble opinion), plastic wrapped desserts?

    I think they are pretty gross, but he LOVES them! He’s loved them since he was a kid. Over Thanksgiving, I planned to spend a few nights with them and wanted to make him a dessert that he REALLY would like, and that weren’t Moon Pies.

    I’ve seen all the latest craze concerning whoopie pies, so of course I had to try them. These turned out perfectly! The “cookie” part is very cake-like and moist. The filling is light and fluffy and a perfect compliment to the cake. When I dished the cookies onto the cookie sheet, I used a large “disher” (one of these things….)Norpro Stainless Steel Scoop, 56MM (4 Tablespoon)

    The cookie/cake things turned out kind of large, so next time, I’ll use a  smaller disher and get a smaller whoopie pie.

    In the end, Daddy LOVED the whoopie pies! He had one every day I was there. Even my mom liked them, and she doesn’t like a lot of sweets. My next whoopie pie adventure…Red Velvet!

    Chocolate Whoopie Pies from Gourmet

    2010 397
    For cakes
    • 2 cups all-purpose flour
    • 1/2 cup Dutch-process cocoa powder
    • 1 1/4 teaspoon baking soda
    • 1 teaspoon salt
    • 1 cup well-shaken buttermilk
    • 1 teaspoon vanilla
    • 1 stick (1/2 cup) unsalted butter, softened
    • 1 cup packed brown sugar
    • 1 large egg
    For filling
    • 1 stick (1/2 cup) unsalted butter, softened
    • 1 1/4 cups confectioners sugar
    • 1 cup marshmallow cream such as Marshmallow Fluff
    • 1 teaspoon vanilla
    Make cakes:
    • Preheat oven to 350ºF.

    • Whisk together flour, cocoa, baking soda, and salt in a bowl until combined. Stir together buttermilk and vanilla in a small bowl.

    • Beat together butter and brown sugar in a large bowl with an electric mixer at medium-high speed until pale and fluffy, about 3 minutes in a standing mixer or 5 minutes with a handheld, then add egg, beating until combined well. Reduce speed to low and alternately mix in flour mixture and buttermilk in batches, beginning and ending with flour, scraping down side of bowl occasionally, and mixing until smooth.

    • Spoon 1/4-cup mounds of batter about 2 inches apart onto 2 large baking sheets covered in parchment paper. Bake in upper and lower thirds of oven, switching position of sheets halfway through baking, until tops are puffed and cakes spring back when touched, 11 to 13 minutes. Transfer with a metal spatula to a rack to cool completely.

    Make filling:
    • Beat together butter, confectioners sugar, marshmallow, and vanilla in a bowl with electric mixer at medium speed until smooth, about 3 minutes.

    Assemble pies:
    • Spread a rounded tablespoon filling on flat sides of half of cakes and top with remaining cakes.

    Cook's Notes:

    • Cakes can be made 3 days ahead and kept, layered between sheets of wax paper, in an airtight container at room temperature.
    • Filling can be made 4 hours ahead and kept, covered, at room temperature.
    Continue reading...

    Sunday, August 8, 2010

    German Chocolate Cake


    recovery737

    I am surrounded by men who are obsessed with German chocolate cake. My husband, nephew and father are all smitten with it. But, I have a secret. I don’t like German chocolate cake. So, when my nephew and father both requested one for their birthday (they are a day apart), I knew I had to make one…and make it good. Because I don’t eat it, I have to assume that good means it has lots of ingredients and requires lots of time. According to the eaters of the cake today, my assumption was right.

    It took about 3 hours to make and I have a mean mess to clean in my kitchen, but it was worth it to see how happy my family were while eating it. It brings me joy to see how baked goods make people happy…I would love to have a bakery one day and experience that joy as my job.

    Anyway, I still haven’t mastered getting a four layer cake to be level. Yes, I have a cake leveler, but I haven’t mastered that either. This cake didn’t disappoint in the crooked category. I also was in a hurry to finish decorating it and my frosting tip came out of my plastic bag. Once that happened, there was no turning back. So, while it wasn’t the prettiest cake, it apparently was very delicious.

    I would suggest a few changes: I used German chocolate in the cake batter as opposed to the bittersweet/un-sweet that the recipe suggests. I just didn’t feel right making a German chocolate cake without GERMAN chocolate. I forgot to add the vanilla extract  in the batter and also didn’t have any dark rum for the syrup. So, I just used vanilla in the syrup instead. I’m sure the rum would add a great flavor, but I didn’t have any and didn’t want to go buy a bottle for 2 ozs. I also didn’t feel like the recipe made enough filling. It doesn’t need to be doubled, but just needs a little more. I barely had enough for the top layer and I know I didn’t over fill the rest of the layers. EDIT: So as I’m typing this, Lane gave me his honest opinion about the cake. While he said it was delicious, he also said that it wasn’t what he thinks of when he thinks of a GCC. He suggested that instead of icing the sides with the ganache, I should used the filling. He said it needed more of that flavor. So, maybe double the filling recipe and use it to ice the sides. You can still decorate the top with the ganache because it’s delicious!

    German Chocolate Cake adapted from David Lebovitz

    For the cake:
    2 ounces bittersweet or semisweet chocolate chopped (I used German Chocolate instead.)
    2 ounces unsweetened chocolate, chopped

    (I used German Chocolate instead.)
    6 tablespoons water
    8 ounces (2 sticks) unsalted butter, at room temperature
    1 ¼ cup + ¼ cup sugar
    4 large eggs, separated
    2 cups all-purpose flour
    1 teaspoon baking powder
    1 teaspoon baking soda
    ½ teaspoon salt
    1 cup buttermilk, at room temperature
    1 teaspoon vanilla extract

    For the filling:
    1 cup heavy cream
    1 cup sugar
    3 large egg yolks
    3 ounces butter (6 T), cut into small pieces
    ½ teaspoon salt
    1 cup pecans, toasted and finely chopped
    1 1/3 cups unsweetened coconut, toasted

    For the syrup:
    1 cup water
    ¾ cup sugar
    2 tablespoons dark rum

    For the chocolate icing:
    8 ounces bittersweet or semisweet chocolate, chopped (I used a bag of Ghirardelli

    2 tablespoons light corn syrup
    1 ½ (3 T)ounces unsalted butter
    1 cup heavy cream

    1. Butter two 9-inch cake pans, then line the bottoms with rounds of parchment or wax paper. Preheat the oven to 350°.

    2. Melt both chocolates together with the 6 tablespoons of water. Use either a double-boiler or a microwave. Stir until smooth, then set aside until room temperature.

    3. In the bowl of an electric mixer (I used my stand mixer), or by hand, beat the butter and 1 ¼ cup of the sugar until light and fluffy, about 5 minutes. Beat in the melted chocolate, then the egg yolks, one at a time.

    4. Sift together the flour, baking powder, baking soda, and salt.

    5. Mix in half of the dry ingredients into the creamed butter mixture, then the buttermilk and the vanilla extract, then the rest of the dry ingredients.

    6. In a separate metal or glass bowl, beat the egg whites until they hold soft, droopy peaks. Beat in the ¼ cup of sugar until stiff.

    7. Fold about one-third of the egg whites into the cake batter to lighten it, then fold in the remaining egg whites just until there's no trace of egg white visible.

    8. Divide the batter into the 2 prepared cake pans, smooth the tops, and bake for about 45 minutes, until a toothpick inserted into the center comes out clean.

    Cool cake layers completely.

    While the cakes are baking and cooling, make the filling, syrup, and icing.

    To make the filling:

    1. Mix the cream, sugar, and egg yolks in a medium saucepan. Put the 3 ounces butter, salt, toasted coconut, and pecan pieces in a large bowl.

    2. Heat the cream mixture and cook, stirring constantly (scraping the bottom as you stir) until the mixture begins to thicken and coats the spoon (an instant-read thermometer will read 170°.)

    3. Pour the hot custard immediately into the pecan-coconut mixture and stir until the butter is melted. Cool completely to room temperature. (It will thicken.)

    To make the syrup:

    1. In a small saucepan, heat the sugar and water until the sugar has melted. Remove from heat and stir in the dark rum.

    To make the icing:

    1. Place the 8 ounces of chopped chocolate in a bowl with the corn syrup and 1 ½ ounces of butter.

    2. Heat the cream until it just begins to boil. Remove from heat and pour over the chocolate. Let stand one minute, then stir until smooth. Let sit until room temperature.

    To assemble the cake:

    Remove the cake layers from the pans and cut both cake layers in half horizontally, using a serrated bread knife.
    Set the first cake layer on a cake plate. Brush well with syrup. Spread ¾ cup of the coconut filling over the cake layer, making sure to reach to the edges. Set another cake layer on top.

    Repeat, using the syrup to brush each cake layer, then spreading ¾ cup of the coconut filling over each layer, including the top.

    Ice the sides with the chocolate icing, then pipe a decorative border of chocolate icing around the top, encircling the coconut topping.

    Side note: I can’t believe my nephew is 12! I know its cliché to say, but I remember when he was born. I remember his first steps. I remember picking him up from day care. I remember holding him in the hospital when he had RSV. He’s a wonderful boy (he’s not a teenager yet, darn it!) and I am so thankful that God has blessed my life with him.

    Continue reading...

    Wednesday, August 4, 2010

    Snickerdoodledoo! Wahooo!


    summer 028

    Snickerdoodles are my FAVORITE cookies. They are just so good. They aren’t plain like a sugar cookie, but aren’t too complicated like a white chocolate macadamia nut cookie. They are perfect. I don’t normally make cookies, but wanted to send Lane to a party with something that was easy to travel with and we all know how I drive when there are cupcakes in the car…so, snickerdoodles were the answer! I searched for a while trying to find a recipe that didn’t use shortening. It’s just really, really bad for you and I really, really wanted to eat a lot of cookies! So, I came across this recipe from the amazing Annie’s Eats. I haven’t made anything of hers yet that isn’t amazing. (If you have an ice cream maker, you should also try her strawberry ice cream!!)

    These cookies are the perfect snickerdoodle (despite what the fuzzy picture shows..) They have a bit of a crunchy exterior and a super soft interior. They are fluffy and buttery and melt in your mouth!

    Snickerdoodles

    2 3/4 c. all-purpose flour
    2 tsp. baking powder
    1/2 tsp. coarse salt
    1 c. unsalted butter, softened
    1 3/4 c. sugar, divided
    2 large eggs
    4-5 tsp. ground cinnamon

    Preheat oven to 350 degrees F. Sift together flour, baking powder, and salt. Set aside.

    Put butter and 1 1/2 c. sugar in the bowl of a stand mixer fitted with the paddle attachment. Mix on medium speed until pale and fluffy, about three minutes. Mix in eggs.

    Reduce speed to low and gradually incorporate flour mixture.

    In a small bowl, stir together remaining 1/4 c. sugar and cinnamon to preferred ratio. Shape dough into 1 3/4 in. balls (you should have about 20). Roll in cinnamon sugar and place three inches apart on baking sheets lines with parchment paper.

    Bake cookies, rotating sheets halfway through, until edges are golden, twelve to 15 minutes. Let cool on wire racks.  ENJOY!!

    summer 029

    Continue reading...

    Sunday, June 20, 2010

    Homemade Hibiscus


    hibiscus 002

    One night, before attending a play at Dallas’ new Winspear Opera House, we decided to try Hibiscus. We had heard how great it was from friends and for a wedding shower gift, we were given a $50 gift certificate, so we decided to give it a try.

    Let me just say, if I could make babies with Hibiscus…I would. It’s that good. It is one of the best meals we have ever eaten, and well, we eat a lot of meals. Everything we had was unbelievable. We had a lump crab appetizer, we each had salads (I had the bungalow, Lane had the wedge), for our entrees I had the short ribs and Lane had a filet. (He says it’s in the top four best steaks he’s ever had.) We shared their famous macaroni and cheese and had their sour cream apple pie with lavender ice cream for dessert. It’s making me salivate just thinking about it.

    The only problem with Hibiscus is that it’s really expensive. Let’s just say that our $50 gift certificate didn’t even cover the tip. It was really worth it, but now we have to save up to go. So, instead of dropping lots of moola on dinner there, I decided to re-create our dinner here at home. I went to Central Market and got everything I needed and literally spent the rest of the day in the kitchen. Side note: I am currently reading Laura Bush’s “Spoken from the Heart” book and she remembers her mother spending all day in the kitchen…from 5:30 a.m. to after dinner. I have so much more respect for my great grandmother, whose reality was very much similar to that of Mrs. Bush’s mother’s. Lane’s mom also spends a lot of her time cooking when we come visit and I am so thankful. That’s hard work!

    So, the menu for our homemade Hibiscus dinner was:

    Appetizer: Crab meat with Avocado, Fresh Horseradish and cocktail sauce

    Salad: Hibiscus Bungalow salad with Iceberg Lettuce, Tomatoes, Candied Pecans, Smoked Bacon, Avocado, Blue Cheese and Lite Honey Mustard

    Entree: Filet Mignon

    Side: Gourmet Mac and Cheese

    Dessert: Sour Cream Apple Pie with Vanilla Ice Cream

    Recipes:

    Crab Meat with Avocado, Fresh Horseradish and Cocktail Sauce

    hibiscus 003

    Holy crustacean! Do you know how expensive lump crab meat is! Central Market only offered it in 1 lb. containers. Your options were jumbo lump ($26/lb), lump ($16/lb) or claw meat at ($8/lb). I was blow away. I knew we didn’t need a whole pound of crab, and didn’t really want to pay that much for it, so I decided to come up with something else. Well, long story short, I had a craving for crab, so I went to the Whole Foods down the street where I got 1/2 lb of claw meat for $7. Darn it! I should have gotten it at CM. Oh well. In retrospect, I should have just sprung for the lump or jumbo lump. While it was still delicious, it would have been a little better with the better quality meat.

    1 avocado, split in half with the seed removed

    1/2 lb. crab meat (spring for jumbo lump if you can)

    Fresh horseradish, grated

    Juice of half of a lime

    Cocktail sauce, to taste

    Split the avocado in half and place each half on a serving plate. Fill top of avocado with 1/4 lb. crab meat. Top with fresh grated horseradish and a squeeze of lime. Serve with cocktail sauce. Serves 2. Enjoy!

    Bungalow Salad

    hibiscus 008

    1/2 head iceberg lettuce, torn

    1 large tomato, diced

    4 slices Applewood smoke bacon, cooked

    Pecans, toasted in butter and brown sugar

    Blue cheese, to taste

    Honey Mustard Dressing, to taste (the Hibiscus salad is served with a mustard vinaigrette, which I couldn’t find. I should have just made one considering the lite honey mustard dressing I used was very watery.)

    Assemble all ingredients and mix. Serves 2.

    Filet Mignon (From previous Blog Entry)

    Gourmet Mac and Cheese (adapted from Epicurious)

    hibiscus 009

    Hibiscus has amazing mac and cheese. It’s just really good. My friend Tamara is also and fan and when she asked for the recipe, they would only tell her the types of cheese needed. So she passed that information along to me and tried to figure it out. Well, while it was good, I forgot to add the cream cheese, so it was missing a creamy factor. Lane loved it and it had a very mild flavor. I think I’ll keep trying (or just get takeout mac and cheese from Hibiscus!)

    3/4 pound elbow macaroni

    For topping

    2 tablespoons unsalted butter

    2 cups coarse dry bread crumbs

    1 cup coarsely grated extra-sharp Cheddar (about 4 ounces)

    For cheese sauce

    3 tablespoons unsalted butter

    3 tablespoons all-purpose flour

    2 3/4 cups whole milk

    3/4 cups heavy cream

    4 cups coarsely grated cheese (about 1 pound)

    (I used about a 1/2 cup each of Port Salut, Parmesean and Mozzarella. For the rest, I used extra sharp cheddar. I should have also used about 4 oz. of cream cheese.)

    2 teaspoons Dijon mustard

    1 1/2 teaspoons salt

    1/4 teaspoon freshly ground black pepper

    Preheat oven to 400°F. and butter a 3-quart shallow baking dish (13x9 casserole). Fill a 6-quart kettle three fourths full with salted water and bring to a boil for macaroni.

    Make topping:
    Melt butter and in a bowl stir together with bread crumbs and Cheddar until combined well. Topping may be made 1 day ahead and chilled, covered.

    Make sauce:
    In a 5-quart heavy saucepan melt butter over moderately low heat and stir in flour. Cook roux, stirring, 3 minutes and whisk in milk. Bring sauce to a boil, whisking constantly, and simmer, whisking occasionally, 3 minutes. Stir in cream, cheeses, mustard, salt, and pepper. Remove pan from heat and cover surface of sauce with wax paper (put wax paper directly on the cheese sauce surface).

    Cook macaroni in boiling water until al dente. Reserve 1 cup cooking water and drain macaroni in colander. In a large bowl stir together macaroni, reserved cooking water, and sauce. Transfer mixture to baking dish.

    Sprinkle topping evenly over macaroni and bake in middle of oven 20 to 25 minutes, or until golden and bubbling.

    Sour Cream Apple Pie from Simple Recipes

    hibiscus 012

    This is pretty tasty. The crust wasn’t my favorite…it kind of tastes like pop tart crust, but you don’t taste too much of it because the flavor of the pie is pretty strong.

    1 cup sour cream
    2/3 cup sugar
    2 Tablespoons flour
    1/4 teaspoon salt
    1 teaspoon vanilla
    1 egg
    3 cups peeled, sliced tart apples (about 1 1/4 pounds of slices)
    1 9" unbaked pie shell, frozen or chilled in the freezer for at least 30 minutes (see pâte brisée recipe)

    Topping
    1/2 cup brown sugar, packed
    1/3 cup flour
    1/4 cup butter, room temperature
    1/2 teaspoon cinnamon
    Mix together all ingredients until the mixture resembles coarse crumbs. Chill until needed in the recipe.

    Preheat oven to 400°F.

    Beat together sour cream, sugar, flour, salt, vanilla and egg (can beat by hand). Add apples, mixing carefully to coat well.

    Put filling into a pie shell and bake at 400 degrees initially for 25 min.

    Remove from oven and sprinkle with Cinnamon Crumb Topping. Bake for and additional 20 more minutes.

    Let cool for a hour before serving. Serves 8.

    Lane was a happy man, post dinner!

    hibiscus 005

    Continue reading...

    Sunday, February 21, 2010

    Chocolate Chip Cookie Dough Truffles


    I know that picture doesn't look like much, but trust me, these little truffles are like eating bits of heaven... and I don't even like cookie dough. It's the perfect mixture of sweet and bittersweet. They are just perfect. But, beware, you can't just eat one!

    Chocolate Chip Cookie Dough Truffles
    1 stick unsalted butter, room temperature
    1 cup light brown sugar, packed
    1 ½ tsp vanilla extract
    1/8 tsp salt
    2 cups flour
    14 oz can sweetened condensed milk
    1 cup semi-sweet mini chocolate chips
    ½ cup chopped walnuts (optional, I left out)
    2 cups 60% bittersweet chocolate chips
    2 tsp shortening

     Using a stand mixer, beat the butter and brown sugar together until fluffy; about 2 minutes. Add the vanilla, salt and flour; mix well. With the mixer on low, add the condensed milk until the batter is thoroughly combined. Fold in the chocolate chips and walnuts, if using.

    Refrigerate this mixture for at least 15 minutes before working with it.

     Using a tablespoon (or your hands), shape into evenly sized balls and place on a wax paper lined baking sheet. If the dough is sticky, coat your hands with either flour or cooking spray. I found that they get really sticky, so I wore latex gloves that I kept spraying with baking spray. Loosely cover with plastic wrap and refrigerate the balls for 3 hours, or up to overnight.

    To make the chocolate coating, combine the bittersweet chocolate and shortening in a microwavable bowl. Microwave on high in 30 second intervals until the mixture is melted and smooth. Using a toothpick, dip the dough balls in the chocolate to coat. Refrigerate until firm; about 30 minutes.

    Get ready to enjoy heaven!


    Continue reading...